
Discover how to build domestic biogas systems using plastic barrels. Learn about biogas types, DIY construction steps, and cost comparisons to create renewable energy at home.
Biogas systems are an innovative way to recycle organic waste into clean, renewable energy. A biogas producer, often referred to as a digester, utilizes microorganisms to break down organic materials, such as food waste or manure, in an anaerobic (oxygen-free) environment. The result? Methane-rich biogas can be used for cooking, heating, or even electricity generation.
Table of Contents
Types of Biogas Producers
There are several types of biogas systems, each suited to specific needs and environments:
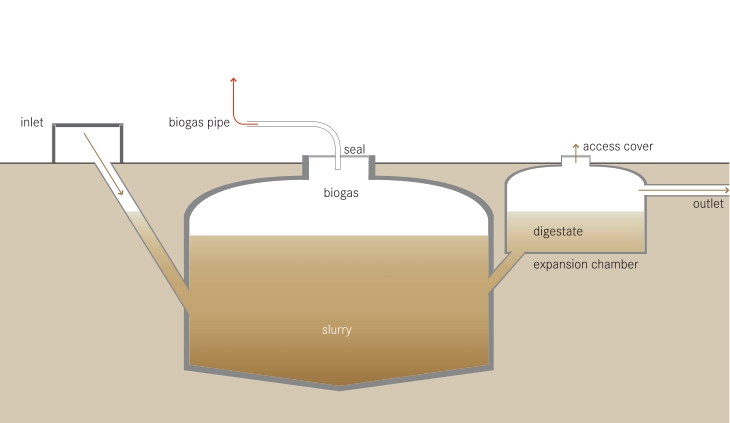
- Fixed Dome Digesters
- Widely used in rural areas, these systems have a permanent brick or concrete dome where biogas is stored.
- Suitable for continuous operation and large-scale use.
- Low maintenance but requires professional construction.
- Floating Drum Digesters
- Feature a movable drum that rises as gas accumulates.
- Commonly used in small-scale domestic setups.
- Easy to operate but prone to corrosion in metal drums.
- Tubular Digesters
- Made from flexible materials like polyethylene.
- Cost-effective and portable, ideal for remote areas.
- Suitable for liquid-heavy organic waste like slurry.
- Plastic Barrel Digesters
- Perfect for DIY enthusiasts and small-scale use.
- Affordable and easy to construct using recycled barrels.
- Ideal for kitchen waste and small organic loads.
How to Build a Domestic Biogas System Using Plastic Barrels
For homeowners or small farms, a plastic barrel digester offers a practical way to produce renewable energy. Here’s a step-by-step guide to building one.
Materials Needed:
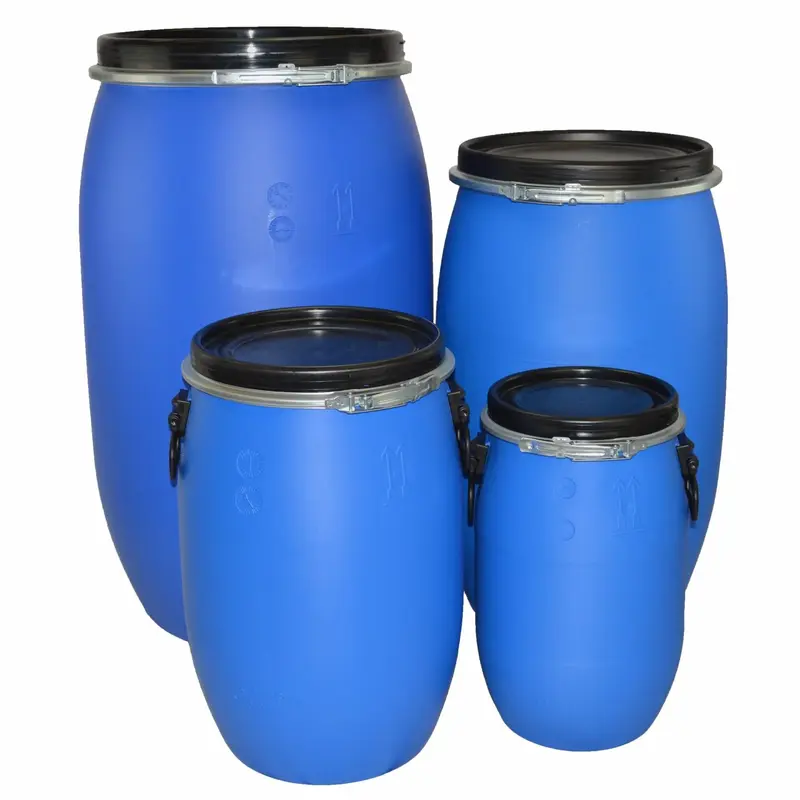
- Two plastic barrels (200-litre size is ideal).
- PVC pipes (1-inch and 2-inch diameter).
- Gas outlet valve and hose.
- Sealing materials (silicone or epoxy).
- Drill with hole saw attachments.
- Organic waste (e.g., food scraps, vegetable peels).
- Water.
Step-by-Step Guide
1. Prepare the Barrels
- The use of two barrels doubles the amount of gas produced as both act as digesters.
- Drill a 3/4-inch hole at the top of the digester barrel for the outlet pipe.
- Drill a second 4-inch hole at the bottom of the digester for the slurry outlet pipe, and a second for the waste input.
- Install the gas outlet valve at the top of the barrel.
2. Assemble the Pipes
- Connect the outlet pipe to the gas outlet.
- Attach a modified water bottle to one of the large diameter pipes from the bottom of the barrel..
- Connect the gas outlet valve to a flexible hose for gas storage or direct use.
3. Seal the System
- Use silicone or epoxy to seal all pipe connections. Ensure no leaks, as biogas production requires an airtight environment.
4. Add the Organic Feedstock
- Fill the digester barrel halfway with organic waste and water (50:50 ratio). Stir to mix.
- Close the barrel lid tightly and ensure all pipes are securely fitted.
5. Allow Anaerobic Digestion
- Place the barrel in a warm, shaded area. Anaerobic bacteria thrive between 30-40°C, so keep the digester insulated if possible.
- Gas production typically begins after 7-10 days.
6. Collect and Use Biogas
- As biogas accumulates, it will flow through the outlet valve into the connected hose or storage.
- Use the gas for cooking or heating applications via a simple burner attachment.
See The Video Below For Details.
Video And Audio Source: Youtube.
Optimizing the System for Efficiency
- Maintain a Consistent Temperature
- Insulate the digester with foam or wrap it in a black tarp to retain heat.
- In colder climates, bury the barrel partially underground to stabilize the temperature.
- Feed Regularly
- Add organic material daily in small amounts to maintain bacterial activity.
- Avoid overloading the system, as it can slow digestion.
- Avoid Non-Digestible Materials
- Exclude plastics, metals, and large bones from the feedstock.
- Stick to easily digestible items like fruit peels, vegetable scraps, and manure.
A Simple System Using Only One Barrel
This is a simpler system which I built as a test piece simply for the experience. The photos are taken from YouTube as stills. In this case, Only one barrel is used so less gas is produced, however, it was sufficient for my purposes and allowed me to operate a small gas torch for brazing.
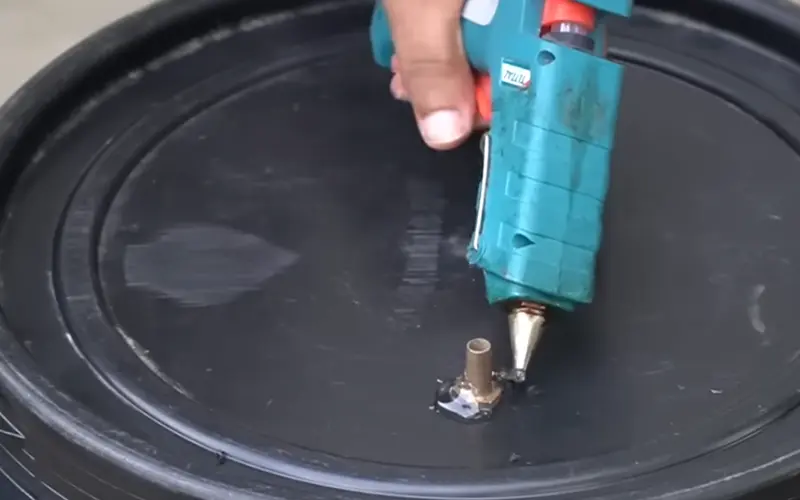
In the first photo a standard gas fitting is added to the lid through a drilled hole and sealed in place with the glue gun.
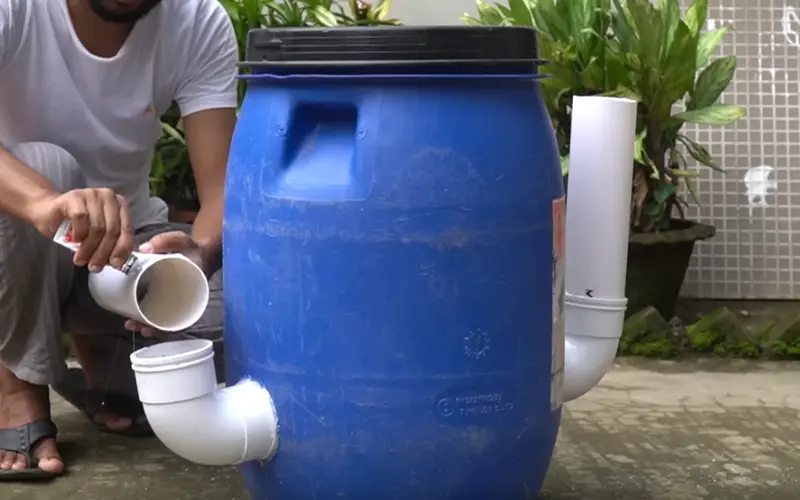
The second photo shows the addition of waste input and a second elbow for emptying, both fitted near the base of the barrel.
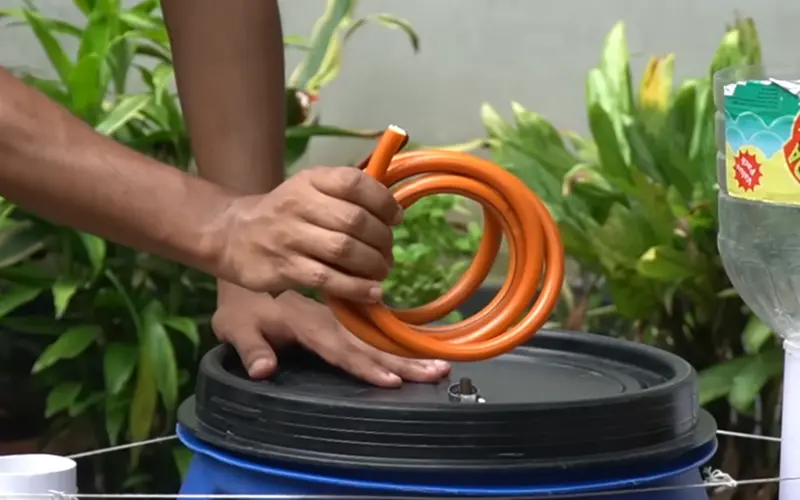
The output hose is connected to the gas fitting on the lid of the barrel.
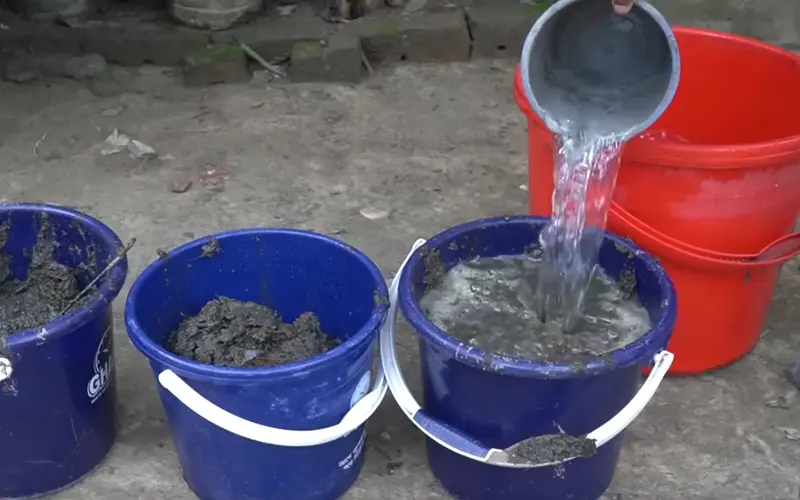
Mix the animal waste with water to a liquid sludge. Add other kitchen waste and a variety of animal waste can be used. We have few cows where I live but lots of sheep.
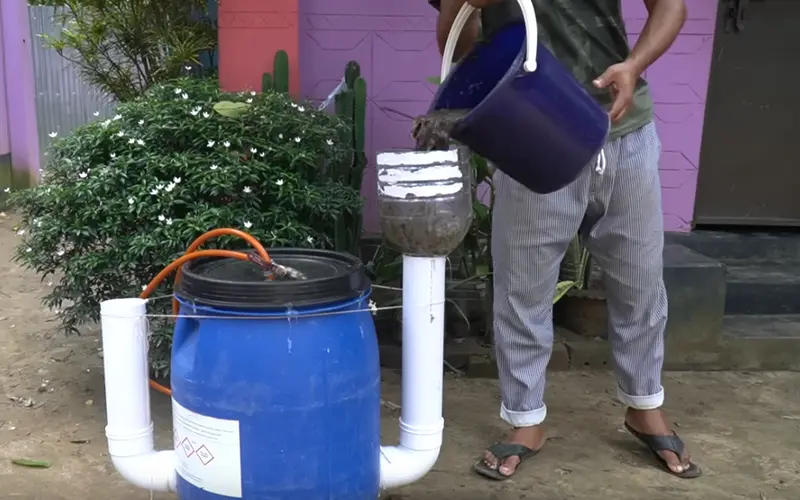
The waste is added through the modified water bottle (cut off the base and open up the neck to the same size as the large pipe and seal with the glue gun). Whilst using the glue gun it may be a good idea to seal around the lid and check all other joints for leaks.
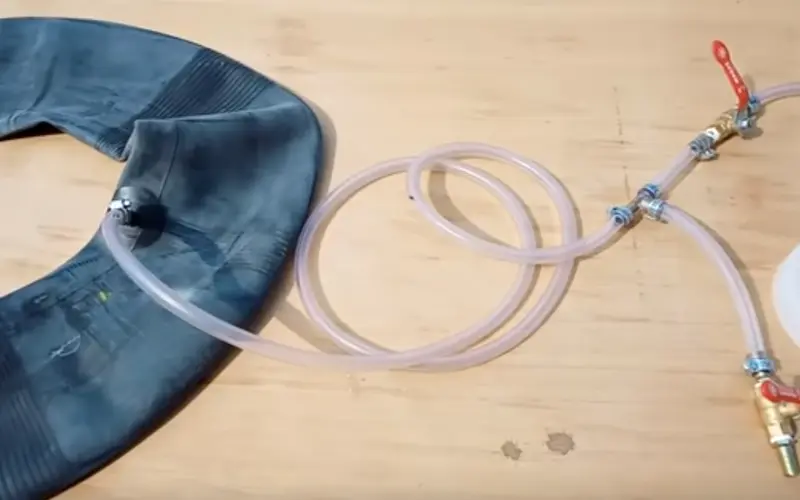
Finally connect the gas outlet from the digester to a rubber tyre tube via a “T” connector and add an on-off valve to the third connection. Don’t forget to remove the valve from the tyre tube or gas will have difficulty getting in but will not get out when you need it. As gas is generated, The tyre inner tube will act as a reservoir for the gas and inflate. This will also add some pressure to the gas output.
Best Biogas Preserving Fluids
While building the system, ensure the barrels and pipes are well-sealed to prevent gas leaks. Treating surfaces with waterproof coatings, such as marine-grade epoxy, will enhance the system’s durability.
Comparison Table Of Common Pipe Insulation Materials To Win The FrostBattle for Outdoor Biogas Systems
- Protect from Waterlogging
- Build a small shelter or place the barrels on an elevated platform to prevent flooding.
- Add drainage around the digester area to avoid standing water.
- Prevent Freezing
- In colder regions, wrap the system with insulation like rock wool or foam boards.
- Use heating cables if temperatures drop below 5°C consistently.
Cost Comparison Table for DIY Biogas Systems
| Material | Estimated Cost (USD) | Supplier |
|---|---|---|
| Plastic Barrel (200L) | $20-$50 | Local hardware stores |
| PVC Pipes (per meter) | $5-$10 | Home Depot, Lowe’s |
| Gas Outlet Valve | $10-$20 | Amazon, eBay |
| Silicone Sealant | $5-$15 | Home Depot, Walmart |
| Flexible Gas Hose | $15-$25 | Plumbing suppliers |
Maintenance and Troubleshooting
- Common Issues: If gas production slows, check for leaks or adjust feedstock composition.
- Cleaning: Empty and rinse the system every 6 months to remove sludge buildup.
- Safety: Always use biogas in a well-ventilated area to prevent gas accumulation.
4. Ensure a Gas Tight Seal
- One of the most critical aspects of a successful biogas system is maintaining an airtight environment inside the digester. Use silicone or gasket material to seal any joints, pipe connections, and the drum lid.
5. Start Adding Organic Matter
- Once the system is sealed, start adding organic waste to the digester through the inlet pipe. Kitchen scraps, food leftovers, manure, and plant material can all be used.
- Try to avoid materials like meat and bones, as they can slow down the digestion process. Ideally, you should maintain a balance between green waste (high in nitrogen) and brown waste (high in carbon) to optimize gas production.
6. Allow the Digestion Process to Start
- After adding the organic material, close the inlet securely and allow the anaerobic digestion process to begin. It can take anywhere from a few days to a few weeks for biogas production to start, depending on temperature, type of waste, and the volume of your digester.
- The digester should be placed in a warm area, as higher temperatures encourage faster digestion and gas production.
7. Collect and Use the Biogas
- As the anaerobic bacteria break down the organic material, methane gas will rise into the gas storage container. The gas will displace the storage unit, and pressure will build up, ready for use.
- Attach the gas outlet pipe to a gas burner or stove, and use a valve to control the flow of gas. The gas can be used for cooking or heating, depending on your setup.

Tips for Optimizing Biogas Production
- Keep it Warm: The bacteria in your digester work best at temperatures between 30-40°C (86-104°F). Consider insulating the digester or placing it in a sunny spot to keep the system warm during colder months.
- Balance Your Feedstock: A mix of high-nitrogen materials (like food scraps) and high-carbon materials (like straw or plant waste) creates the optimal environment for methane production. Avoid adding too much water or overly fibrous materials.
- Stir Regularly: If possible, mix the contents of the digester regularly. This ensures an even breakdown of materials and prevents the formation of scum layers.
Conclusion
For the DIY enthusiast, building a small-scale biogas generation system at home is an achievable and eco-friendly way to manage waste and produce renewable energy. By converting kitchen scraps and organic waste into biogas, you can reduce your carbon footprint, save on energy costs, and create nutrient-rich fertilizer for your garden. While it requires some initial setup and care, the rewards of having a sustainable energy source at home can be significant. Whether you use it for cooking, heating, or powering small appliances, a home biogas system is a step toward a greener future.