
A DIY Guide to wiring a UK 3 pin plug, Light Switches, and Lighting Choices
This guide will walk you through wiring a UK 3 pin plug, tackling a light switch, choosing the right bulbs, and ensuring your extension cable doesn’t turn into a mini heater while you’re drilling away. Ever had a plug that’s hanging on for dear life or a light switch that refuses to cooperate? Or maybe you’re still clinging to those old incandescent bulbs, lighting up your home and your energy bill like it’s 1995. Fear not!
Let’s get those wires untangled and those lights glowing!
Table of Contents
Step 1: Wiring a UK 3 Pin Plug (Plugging into Knowledge)
UK plugs are sturdy little beasts designed with safety in mind, but only if you wire them correctly. Here’s how to do it:
Tools You’ll Need:
- Screwdriver
- Wire cutters/strippers
- A functioning brain (preferably caffeinated)
The Anatomy of a 3 pin plug:
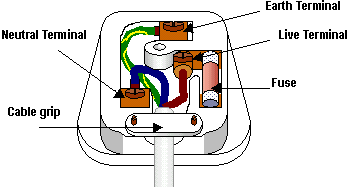
- Live Wire (Brown): Connects to the fuse. Think of it as the plug’s fiery, energetic core.
- Neutral Wire (Blue): Completes the circuit, carrying electricity away safely.
- Earth Wire (Green/Yellow): Your safety net—protects you if something goes wrong.
Wiring Steps:
I’m going to walk you through how we wired UK 3 pin plugs for maximum safety when I was senior electronics technician in the National Health Service. We had to provide for any danger, such as patients and visitors tripping over cables and pulling out the wires.
- Unscrew the plug cover.
- Cut and strip about 1 cm of insulation from each wire.
- *IMPORTANT PART* Leave the green/yellow wire twice as long as the other two. Although it’s not shown in the picture, coil the green/yellow wire once inside the plug to make it longer. There’s plenty of room. We did it for every plug.
- Loosen the terminal screws.
- Attach the wires:
- Brown wire to L (Live) to the fuse connection.
- Blue wire to N (Neutral).
- Green/Yellow wire to E (Earth) the large pin at the top.
- Yes, I know the green/yellow wire is too long. The reason is this. If someone pulls the wires out of a plug which is live, it’s quite possible for the blue and the green /yellow to disconnect leaving the brown connected. In this condition, the equipment has only one connection and that connection is the difference between “Oh dear” and ZAP……. With a long safety earth wire, it is far more likely that the brown and blue will disconnect first, leaving the safety earth wire as the last protection.
- Clamp the cable securely to prevent it from pulling loose.
- Now make sure that you did not strip away too much of the outer plastic sleeve from the cable. When you clamp the cable with the cable grip with the two screws, IT MUST NEVER BE CLAMPED ONTO THE COLOURED WIRES. If it would be, then start again and shorten the coloured wires as there is insufficient grip without the outer cable sleeve (and it looks so amateur). PROTECT YOUR LIFE AND THOSE OF YOUR FAMILY. ELECTRICITY KILLS…
- Replace the cover and tighten the screws.
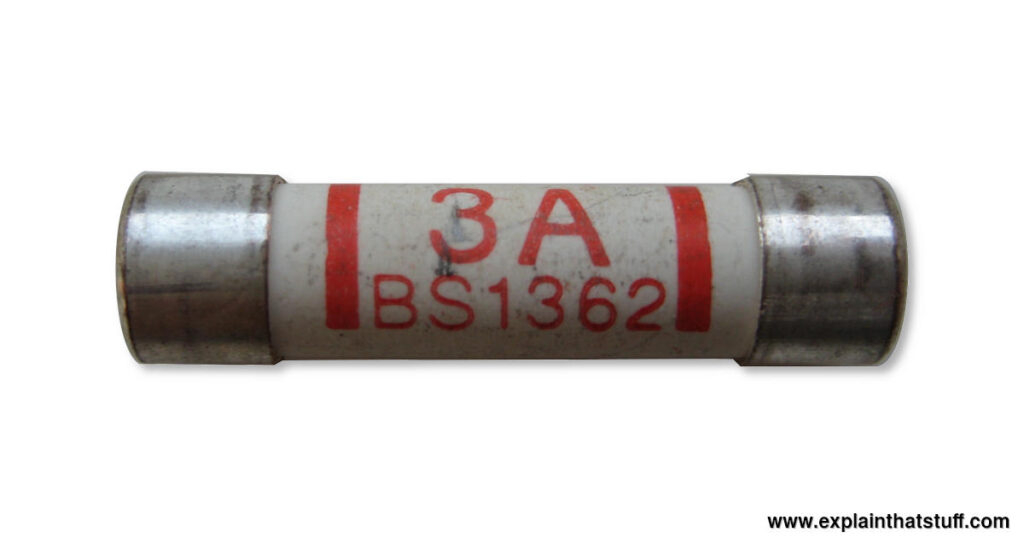
IMPORTANT: 3 pin Plugs are supplied with a 13 amp fuse. Always double-check the fuse in the 3 pin plug. A 3A fuse is suitable for low-power devices, while 13A is for heavier appliances. If you are using something of low power, CHANGE THE FUSE for a 3 amp one. They cost only a few pence and can save your equipment or your life.
Step 2: Wiring a Light Switch (Shedding Light on the Matter)
Wiring a light switch may sound intimidating, but it’s straightforward when you break it down.
Tools You’ll Need:
- Screwdriver
- Insulated wire cutters/strippers
- Voltage tester (because staying alive is cool)
The Basics:
A standard UK light switch has three terminals:
- COM (Common): The live wire goes here.
- L1: Connects to the light.
- L2: For two-way switching systems (e.g., top and bottom of stairs).
- If the switch is only for one way (there isn’t a switch at the top of the stairs for example) then just ignore the L2 connection. You don’t need it.
Wiring Steps:
- Turn off the power. No one likes a shocking experience.
- Use a voltage tester to confirm the circuit is dead.
- Unscrew the existing switch.
- Note how the wires are connected (or take a photo).
- Connect the wires to the new switch:
- Live wire to COM.
- Switch live (usually sleeved brown) to L1.
- Secure everything and screw the switch back onto the wall.
- Turn the power back on and test.
Pro Tip: For a dimmer switch, make sure it’s compatible with LED bulbs if you’ve embraced the future.
Step 3: Choosing the Right Light Bulbs (Bright Sparks Only!)
The days of incandescent bulbs are fading faster than the sun on a rainy British afternoon. LEDs are the way forward. Why?
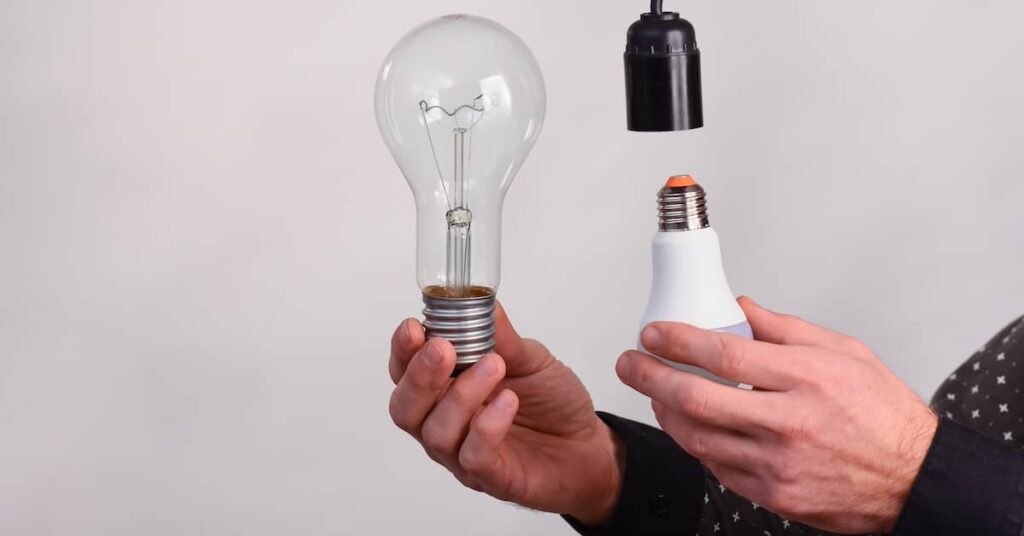
LED vs. Incandescent Bulbs:
- Energy Efficiency: LEDs use up to 80% less energy for the same light output. Why? because much of the power taken by an incandescent light bulb is given off as heat.
- Longevity: They last up to 25 times longer than incandescent bulbs.
- Heat Emission: LEDs stay cool, while incandescent bulbs could double as toasters.
- Cost Savings: Though pricier upfront, LEDs pay for themselves with lower energy bills.
- It’s easy to distinguish an energy saving bulb from an incandescent one. Energy saving bulbs are plastic as they don’t get much more than warm. Incandescent bulbs are metal and glass because the waste energy as heat and can easily burn you.
Where to Use LEDs:
- Kitchens: Bright white LEDs for task lighting.
- Living Rooms: Warm white LEDs for a cozy glow.
- Bathrooms: Waterproof LEDs for safety and style.
Pro Tip: Look for bulbs with a high CRI (Colour Rendering Index) for truer, more vibrant colours.
Step 4: Extension Cables: Don’t Get Tangled
We all love a good extension cable—until it turns into a coiled snake of doom. Here’s what you need to know to avoid overheating disasters.
Why Uncoil Cables?
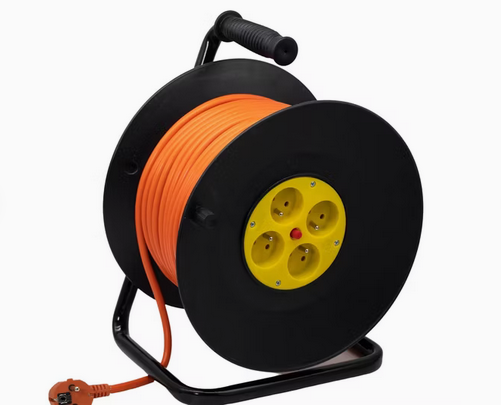
When you use a coiled cable with power tools or high-wattage appliances, the current generates heat. This creates eddy currents, which are tiny swirling currents within the cable. When the cable is coiled, heat gets trapped, potentially melting the insulation or causing a fire.
Best Practices for Extension Cables:
- Fully uncoil the cable before use.
- Check the wattage rating of the cable.
- Inspect for damage regularly (because sparks should stay on your welding project, not the cable).
Electrifying Success
And there you have it—a crash course in DIY electrics with a touch of charm! You’re now armed with the know-how to wire a UK plug, tackle a light switch, choose the right bulbs, and keep your extension cables cool under pressure.
Whether you’re lighting up a room or firing up a power tool, safety and style go hand in hand. Now, get out there and brighten up your world—literally!