
When I decided to build my own garden shed, I thought, “How hard can it be?” Famous last words. But with a bit of elbow grease, some planning, and a lot of trips to the DIY store, I managed to create a sturdy, well-insulated shed that not only keeps my tools dry but looks great, too. If you’re thinking about tackling this project, I’ll let you in on the process so you can avoid some of the hiccups I encountered.
Table of Contents
The Base: A Concrete Raft to Anchor It All
Let’s start from the ground up—literally. A shed is only as good as its foundation, and I went for a concrete raft base because it’s solid, durable, and gives your shed the stability it needs to weather any storm (or overly enthusiastic squirrel).
Step 1: Preparing the Ground
First, I picked a spot in my garden that was relatively level and clear of any roots or debris. This happened to be fairly near the back door which was ideal because I wanted to store my generator in there for the winter evenings when we have no electricity- a fairly common occurrence. I marked out the area using stakes and string, making sure the dimensions included enough wiggle room for the shed’s footprint.
Next came the fun part—digging. I excavated the ground to about 6 inches deep. The neighbours probably thought I was burying treasure. Then, I added a 2-inch layer of compacted gravel to help with drainage.
Step 2: Mixing the Concrete
I built a wooden frame (also known as formwork) to keep the concrete contained. After mixing up several bags of ready-mix concrete(pro tip: rent a mixer unless you fancy a forearm workout), I poured it in and levelled it with a straight edge.
Before the concrete set, I embedded anchor bolts at each corner and along the sides. These would later secure the shed’s frame to the base, ensuring it wouldn’t budge even if a herd of wildebeests stampeded through my garden.
These were nothing more than large mushroom-headed bolts about 8 inches long, upside down with bloody great washers on them cut from some thick steel scrap and drilled for the bolts. They were also tack welded to the bolts as there’s nothing worse than trying to bolt down the shed only to find that the bolts go round and round. You can’t get them back out.
Mark them and place them carefully to be sure they do in fact catch the bottom rail of the shed.
If this sort of thing does happen to you and the bolts are otherwise firmly under the concrete, just drop a piece of steel plate over the bolt and tack weld. The plates can be locked to the shed frame.
Building the Frame: The Backbone of the Garden Shed
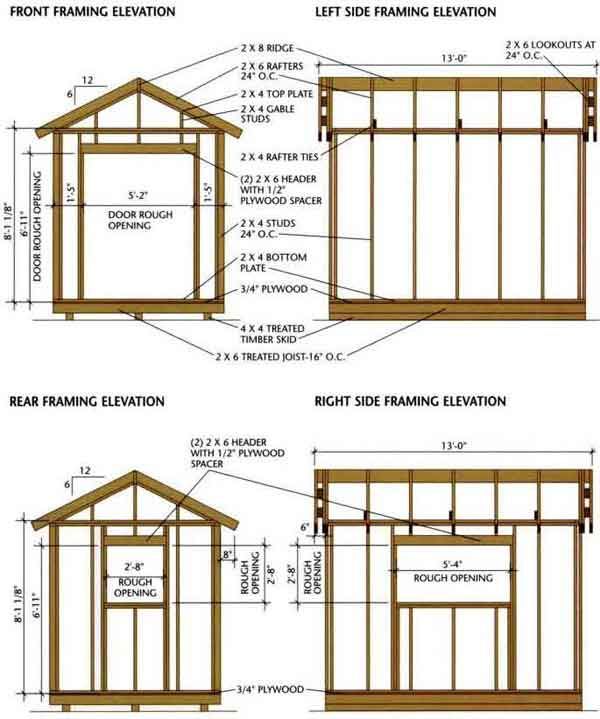
Once the base had cured (I gave it 48 hours just to be safe), I started on the wooden frame. I used pressure-treated timberto prevent rot and laid out all the pieces before assembling—measure twice, cut once, as the saying goes. The diagram shows the shed built on three “skids” as they are called.
I didn’t add these originally, but they are worthwhile as they prevent the shed from sitting directly on the concrete where it could eventually rot the frame. Mine has since been lifted about 3 inches and rails have been added underneath to prevent the rot.
I fitted double doors wide enough to access myself via one door but then with both open, my largest projects can enter (or rather – exit) easily.
Step 1: Assembling the Garden Shed Walls
I built the walls on the ground first, screwing the studs into place. For the front wall, I made sure to leave an opening for a door, with a window in one of the side panels. I wanted natural light, not a dark spider lair.
Step 2: Erecting the Frame
With a couple of friends roped in (they thought they were coming over for tea—ha!), I lifted each wall into place and secured it to the concrete base using the anchor bolts. We used long bolts to join the corners, ensuring the frame was square and sturdy.
Adding a Roof: The Cherry on Top
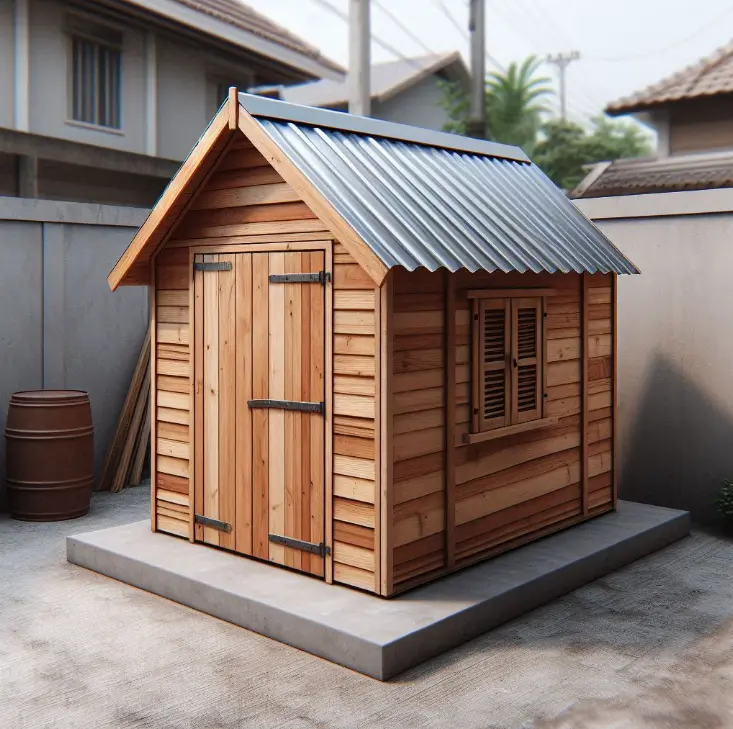
For the roof, I opted for a simple pitched design. It not only looks charming but also allows rain to run off easily. Nobody wants a soggy garden shed.
Step 1: Roof Structure
I attached rafters to the top of the walls, spacing them evenly for support. Then, I nailed plywood sheets onto the rafters to create the roof deck.
Step 2: Choosing the Roof Covering
Now, here’s where you’ve got options. I went with corrugated metal sheets because they’re durable, lightweight, and give off a rustic vibe. If metal isn’t your style, shingles or felt are also good choices, though they might not last as long.
To secure the roof covering, I overlapped the sheets and screwed them down with waterproof fasteners. A bit of silicone sealant at the joints ensured no leaks would rain on my parade—or my tools.
Insulating the Shed: Keep It Cosy
If you’re planning to use your garden shed year-round (or if you just want to protect your tools from the cold), insulation is a must. I didn’t want my spade freezing its handle off during the winter.
Step 1: Insulating the Walls
I stapled a vapour barrier to the inside of the frame before fitting in rigid foam insulation panels. These are easy to cut and provide excellent thermal protection. Over the insulation, I added a layer of plywood for a finished look.
Step 2: Insulating the Roof
For the roof, I used the same rigid foam panels, wedging them between the rafters. I then covered them with plywood and added a coat of paint. A bright white ceiling makes the space feel bigger—an old decorator’s trick.
Step 3: Sealing the Edges
To prevent drafts, I sealed all the gaps with expanding foam and caulk. My shed felt snug enough to host a garden party. Well, almost.
shed insulation, insulating a garden shed roof
Adding the Window: Let There Be Light
What’s a garden shed without a window? (Answer: a very boring box.) I picked up a small, pre-glazed window from the hardware store. It was lightweight, easy to install, and perfect for letting in some sunlight.
I cut the opening in the front wall using a jigsaw, fitted the window into place, and secured it with screws. A bit of weatherproofing tape around the edges ensured it stayed watertight.
installing a window in a garden shed
Final Touches: The Devil’s in the Details
After the heavy lifting was done, I painted the exterior with weatherproof paint to protect it from the elements. I chose a cheerful green—it blends into the garden and makes the shed look like it’s always been there. A water barrel collects rain water for watering plants.
Inside, I added shelves, hooks, and a pegboard for organization. Now, everything has its place, from my hedge trimmers to the oddly satisfying collection of screws I’ve been hoarding.
shed organization tips, painting a garden shed
Lessons Learned (So You Don’t Have To Repeat Them)
- Plan Ahead: Sketch out your design and make a list of materials before you start. I spent way too much time running back to the store for “just one more thing.”
- Don’t Skimp on Quality: Cheap materials might save you money upfront but can lead to costly repairs later. Trust me, you don’t want to redo your roof after the first heavy rain.
- Take Your Time: Rome wasn’t built in a day, and neither is a shed. Rushing leads to mistakes (and a lot of colourful language).
The Result
Building my own garden shed was a challenging but rewarding experience. It’s more than just a place to store tools—it’s a testament to what you can achieve with a bit of determination and a lot of coffee. If I can do it, so can you. Now, go on, give it a go—and don’t forget to invite your friends over for the heavy lifting!
- garden shed base preparation
- concrete raft base for shed
- shed anchor fixings
- garden shed with a window
- shed roof design
- roof covering for garden shed
- shed insulation
- insulating a garden shed roof
- installing a window in a garden shed
- shed organization tips
- painting a garden shed