
Do you have a wall in your garden which needs something, but you’re not sure what it is? A beautiful way to give life and that big something extra is to make a living wall. It adds colour and interest to any area which is lacking and is easy to upkeep. It’s particularly useful for elderly folk who can’t get down to do the garden any longer.
Table of Contents
Why Build a Living Wall?
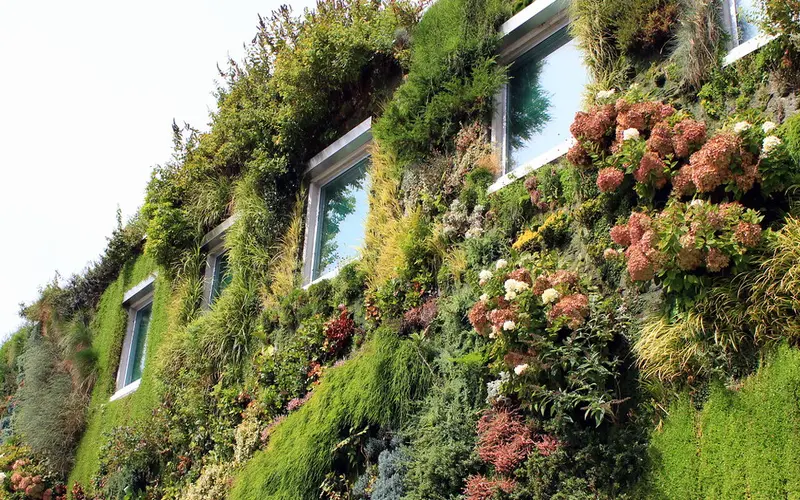
Living Walls or Green Walls, are beautiful additions to any space, even outside of your home. There are loads of reasons to get excited about this project:
- Space-saving greenery: If you don’t have a lot of ground space for a garden, a vertical living wall lets you grow plants without taking up too much room.
- Eco-friendly: You’re not only adding plants (which are good for the environment), but you’re also recycling materials that might otherwise end up in a landfill.
- Aesthetics: A living wall just looks amazing. It’s a natural, beautiful way to bring life to your home, garden, or balcony.
- Air quality: Plants help purify the air, so having a bunch of them in one vertical space can give your environment a refreshing feel.
Whether you want it indoors or outdoors, a living wall is a great way to show off your DIY skills while bringing a bit of nature into your life.
Gathering Your Materials
Since we’re focusing on recycled items, you probably won’t need to buy much (if anything at all!). The idea here is to use what you already have and get creative. Here’s a basic list of things you’ll need:
Recycled Materials:
- Old pallets: These are fantastic for the framework. If you’ve got an old pallet lying around, you’re golden.
- Plastic bottles: They’re perfect for holding plants, and you can cut and shape them to suit your design.
- Wooden crates: You can often find old crates at markets or grocery stores. They can be repurposed as planters or shelves.
- Metal cans: From coffee tins to old soup cans, metal containers can easily be repurposed as pots for your plants.
- Old guttering: If you’ve replaced your gutters recently, the old ones can be used for planting long rows of herbs or succulents.
- Fabric pockets: If you’ve got any old canvas or tough fabric, you can sew it into pockets to create a unique living wall feature.
Tools:
- Screws/nails: To attach everything.
- Screwdriver or hammer: Whatever you’re most comfortable using.
- Drill: For creating drainage holes.
- Utility knife or scissors: To cut bottles or fabric.
- Measuring tape: To make sure everything lines up neatly.
- Potting soil: For your plants to grow in.
- Plants: Succulents, herbs, or trailing plants work great for living walls.
Step-by-Step Guide to Building Your DIY Living Wall
Let’s get into the fun part—building your living wall! I’m breaking this down into easy steps, so you can follow along without getting lost.
Step 1: Decide on the Size and Location
Before anything else, figure out where you want your living wall to go. Are you thinking of something small to brighten up a kitchen wall, or a larger outdoor piece that can hold loads of plants? Take a look at the space and decide how big you want to go.
Once you know the size, plan out where the recycled materials will fit. If you’re using a pallet, you can lean it against a fence or wall. You may need to attach things directly to a wall for a more elaborate setup.
Step 2: Prepare the Framework
If you’re using an old pallet or a wooden frame, start by sanding it down to make sure there are no rough edges or splinters. You want to make sure it’s sturdy enough to support the weight of the plants and soil.
Secure the pallet vertically by either leaning it against a wall or attaching it with screws for more stability. If you’re using crates or other items, stack them in a way that creates a stable structure.
Step 3: Creating the Planters
This is where you can get creative with your recycled materials. Here’s how to repurpose different things into planters:
- Plastic bottles: Cut them in half and use the bottom half as a planter. Punch a few holes in the bottom for drainage and attach them to your frame using screws or nails.
- Metal cans: Same idea—clean them out, add drainage holes, and either attach them directly to the frame or use wire to hang them.
- Fabric pockets: If you’ve got an old canvas or any durable fabric, sew some simple rectangular pockets. Attach the fabric to the pallet or frame by stapling or nailing the edges securely.
- Guttering: Old gutters make excellent planters for herbs. Just mount them horizontally to your frame and fill them with soil.
You can mix and match these materials to create a unique, visually interesting layout. Don’t be afraid to experiment!
Step 4: Add Soil and Plants
Now comes the fun part—filling everything with soil and adding your plants! Make sure you use a good-quality potting mix, as this will help your plants thrive.
When choosing plants, think about what will work best for your space. If it’s a sunny outdoor wall, go for sun-loving plants like herbs, succulents, or even strawberries. For shadier spots, ferns, ivy, and other shade-tolerant plants work great.
Start planting! Add a layer of soil to each planter, then carefully place your plants in, making sure they’re snug and supported.
Step 5: Water and Maintain
After you’ve planted everything, give your new living wall a good watering. Keep in mind that vertical gardens can dry out faster than traditional ones, so you’ll need to water them regularly, especially in hot weather.
If you’re feeling particularly ambitious, you could even install a drip irrigation system to make watering easier. Otherwise, a watering can or hose will do just fine.
Keep an eye on your plants to make sure they’re thriving. You might need to prune or replace plants occasionally, but that’s all part of the fun!
Personal Touches and Tips
Here’s where you can let your creativity shine. Since you’re building this from recycled materials, no two living walls are going to look the same—and that’s awesome! Here are a few tips to make your wall stand out:
- Mix and match materials: Combine metal, wood, plastic, and fabric to create an eclectic, unique look.
- Add a splash of colour: Paint the wooden frame or cans for a pop of colour, or choose plants with vibrant leaves.
- Create different sections: You can dedicate one area of the wall to herbs, another to flowers, and maybe even add a section for succulents.
- Make it functional: If you’re into cooking, planting herbs like basil, thyme, and rosemary will give you easy access to fresh ingredients right from your wall.
Why You’ll Love Your Living Wall
A living wall isn’t just a cool DIY project—it’s a reflection of your creativity, resourcefulness, and love for nature. You’re not just creating a piece of art; you’re also contributing to a greener, more sustainable lifestyle.
And let’s be real, there’s something incredibly satisfying about turning old, discarded materials into something beautiful and functional. Your living wall will be a conversation starter, a source of fresh air, and a daily reminder of what you can achieve with a little imagination and effort.
Building a living wall with recycled materials is the perfect DIY project for anyone who wants to combine gardening with sustainability. It’s simple, rewarding, and adaptable to any space. Plus, it’s a great way to upcycle old items and breathe new life into them—literally!
So, go ahead and give it a try. Gather up those old bottles, crates, and cans, and get creative with your design. Before you know it, you’ll have a thriving vertical garden that’s as unique as you are. Happy DIYing!