
Have you thought about trying your hand at candle making? Maybe you’ve noticed that candles are getting a bit expensive to buy, or maybe you would like to try something creative that’s both functional and beautiful. Making your own homemade candles is satisfying and avoids the chemicals often found in bought candles. Even plain nothing to it candles are getting expensive plus you can decorate your candles so that they are not only functional but decorative too. Beeswax candles burn longer than paraffin wax candles are cleaner and fill your home with a light, sweet honey scent.
Table of Contents
Why Make Your Own Beeswax DIY Candles?
- All-natural: Beeswax is a natural by-product of honey production. It’s free from harmful chemicals and additives.
- Eco-friendly: Unlike paraffin wax (which is derived from petroleum), beeswax is renewable and biodegradable.
- Longer burn time: Beeswax candles tend to burn slower, so they last longer than other candles.
- Air purifier: This might sound strange, but beeswax candles produce negative ions when burned, which can help cleanse the air of dust, pollen, and other impurities.
- Pleasant aroma: Beeswax has a naturally sweet, honey-like scent, so there’s no need to add artificial fragrances.
Materials You’ll Need
Making your own beeswax candles, if pretty easy but does require a few bits and pieces which you can buy from many outlets such as DIY and hobby shops, Amazon and other online suppliers
Ingredients:
- Beeswax: You can buy beeswax in pellets, blocks, or sheets. Pellets are often the easiest to work with since they melt quickly.
- Wicks: Go for natural cotton wicks. Make sure the size of the wick matches the diameter of your container or candle mould.
- Candle containers or moulds: You can use anything from jam jars to old tin cans or even recycled glass containers but to make candles which are not in fixed containers, you need silicone moulds..
- Coconut oil (optional): Some people like to add a little coconut oil to soften the beeswax and help the candle burn more evenly and even comes in a variety of scents.
Tools:
- Double boiler or makeshift version: You’ll need a way to melt the beeswax gently. If you don’t have a double boiler, you can create one by placing a metal bowl over a pot of simmering water or use a steamer with the bowl of wax pellets inside..
- Wooden spoon: Stir the wax as it melts.
- Thermometer (optional): Not a necessity, but if you’re a perfectionist, you can use it to monitor the wax temperature to ensure it melts evenly. The “gun” style of thermometeris best as it measures the temperature without contact with the wax so doesn’t need to be cleaned
- Popsicle sticks or clothespegs: These will help keep the wicks centred in your containers while the wax cools.
Making Beeswax Candles Step-by-Step
Step 1: Set Up Your Work Area
Cover your workspace with some newspaper or an old cloth. Wax can get messy, and the last thing you want is beeswax stuck to your countertops or floors.
Make sure your containers or moulds are clean and ready to go. If you’re using something like jam jars, wash and dry them thoroughly.
Step 2: Prepare Your Wicks
Cut your wicks to the correct length based on the height of your containers. You want the wick to be long enough that it sticks out of the top by about an inch. To keep your wick centred while the wax cools, you can tie it to a popsicle stick or clip it with a clothespeg to hold it in place across the top of your container.
Place the wick inside the container and make sure it’s hanging straight down the middle.
Step 3: Melt the Beeswax
If you’re using a block of beeswax, cut it into smaller pieces so it melts faster. Add the beeswax (and optional coconut oil) to your double boiler or makeshift version. Set the heat to medium and wait for the wax to melt completely. Stir occasionally to help it melt evenly.
If you want to soften the beeswax a little, add 1 to 2 tablespoons of coconut oilfor every 1 cup of beeswax. This is totally optional but can help the candles burn more consistently. Some people like their candles to be pure beeswax, so it’s entirely up to you.
Step 4: Pour the Wax into Containers
Once the beeswax is fully melted, it’s time to pour it into your moulds. Be careful here—the wax will be hot and can easily burn your skin. Slowly and steadily pour the wax into each container, making sure to leave a bit of space at the top.
As you pour, keep an eye on your wicks. You may need to adjust them slightly to make sure they’re still centred.

Step 5: Let the Wax Cool and Set
Now all you have to do is wait. Allow the wax to cool and harden at room temperature which can take several hours, depending on the size of your candles.
As the wax cools, you may notice a small sinkhole forming around the wick—that’s totally normal. If it happens, simply reheat a bit of wax and pour it on top to smooth things out.
Step 6: Trim the Wicks
Once your candles have fully cooled and set, you’ll want to trim the wicks to about 1/4 inch above the wax. This will ensure your candles burn properly and don’t produce too much smoke.
Customising Your Beeswax Candles
- Add Essential Oils: Beeswax already has a lovely natural scent, but if you want to add your own scent, you can add a few drops of essential oils like lavender, eucalyptus, or cinnamon into the wax and stir well in before pouring it. If you use the scented coconut oil, you don’t need to add any scents to your candles
- Colour Your Candles: If you want to add a pop of colour to your candles, you can mix in some natural candle dye or even pieces of crayon. Just make sure it’s a wax-based colourant so it blends well with the beeswax.
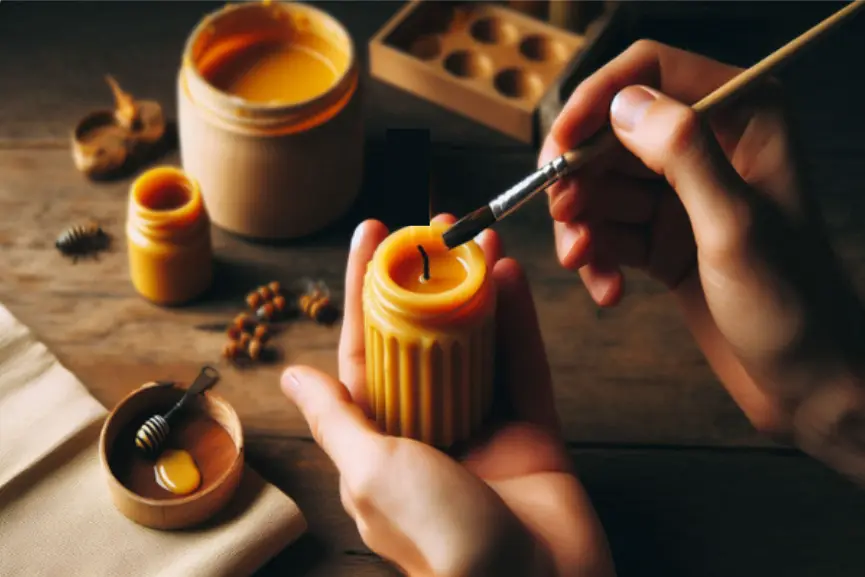
- Decorate the Containers: Once your candles have cooled, you can decorate the outside of your containers with ribbon, twine, or even hand-paint themto give them a rustic or personalised touch.
Tips for Burning Beeswax Candles
- Burn long enough: The first time you light your beeswax candle, make sure to let it burn long enough for the wax to melt right across the surface. This will prevent tunnelling, where the wax only melts in the centre.
- Trim the wick: Before each burn, trim the wick to about 1/4 inch to avoid excess smoke and ensure an even burn.
- Avoid drafts: Try to burn your candles in a draft-free area. Strong winds or breezes can cause the flame to flicker, which leads to uneven burning.
Why You’ll Love Your Homemade Beeswax Candles
Not only do you get the satisfaction of making something with your own hands, but you also get to enjoy the benefits of natural, clean-burning candles. They’re better for the environment, healthier for your home, and they make great gifts, too.
Plus, there’s something truly special about lighting a candle you made yourself—it feels more personal, more intentional. Every time you light one, you can enjoy that warm, cosy feeling that comes with knowing you created something both beautiful and useful.
Making natural beeswax candles is a fantastic DIY project for anyone looking to combine creativity with practicality. It’s easy enough for beginners but still offers plenty of room for customization, so you can really make it your own.
Whether you’re looking to reduce your environmental impact, add some cosy ambience to your home, or just try something new, beeswax candle making is a fun and rewarding project that you’ll love.
As an Amazon associate, I earn from qualifying purchases. This does not affect your purchase price.