
Building a farmhouse table was something I always wanted to do. Having made one years ago, I wanted to try something different so this time I went for a 500 year old design, a little different from the norm.
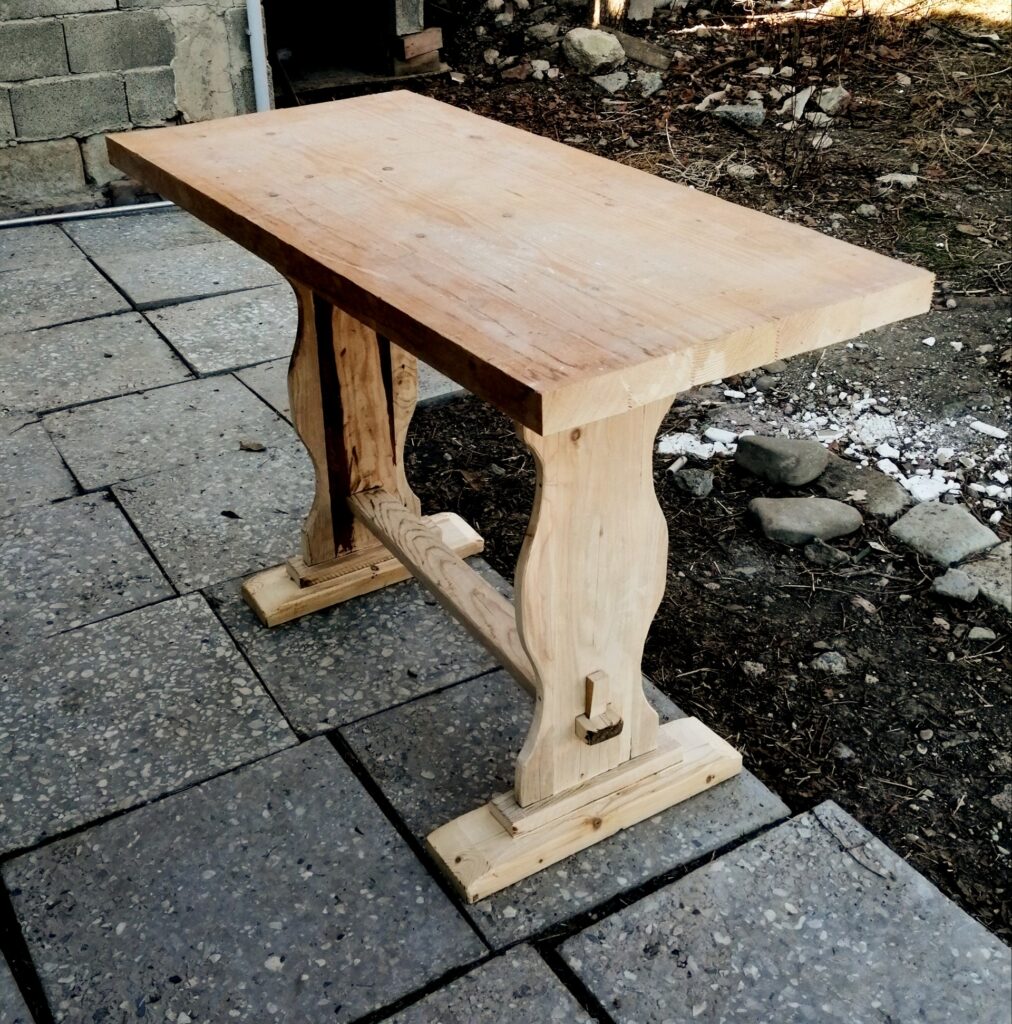
Have you looked at those beautiful farmhouse tables and wished for one? They have something about them. The style, simplicity, rugged and old-world. If you would like one as a centre-piece of your room or purely for practical reasons, you don’t need to pay a small fortune for one – make your own farmhouse table. They aren’t so difficult to make. After all – I made my own, it’s not perfect by any measure but it looks very good. I’m not a carpenter but I try and I’m happy with it.
Table of Contents
I’m going to tell you about my experience building a farmhouse table. Most of the farmhouse tables you will see are straightforward flat top with four stout legs and occasionally with drawers. Mine was made from a 500 year old design using only two legs. A little more fancy but not so that it becomes difficult. Just remember that 500 years ago the modern tools we use now weren’t available so it really was much more difficult then. Anyway – let’s begin.
Why Build Your Own Farmhouse Table?
Here’s all the information you need to do it, so if you are handy with basic tools and you have a bit of time, that’s all you’ll need to make a kitchen table
- Custom Size: You get to tailor it to the size of your space. If you need a 6-foot table for those big family dinners or a smaller one for the kitchen, no problem. They look good in any part of the house.
- Cost: To buy a farmhouse table from a store can set you back a pretty penny. Building your own is much cheaper and if you do it right, you’ll get a high-quality piece that’s sturdy and made exactly the way you want it.
- Sentimental Value: There’s also something special about using the furniture you made yourself. We use ours almost every day and the best part is that for materials, it cost me absolutely nothing as it was made from scrap and other wood which I had laid around in my workshop and the yard.
Materials and Tools You’ll Need To Make A Table
You don’t need a full woodworking shop to make a table, but there are some basic materials and tools you’ll need. Mine was made up on the flat roof of my kitchen in the sunshine. Here’s what you should get together :
Materials:
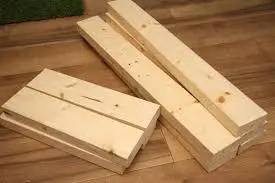
- 2x4s or 2x6s for the tabletop: The exact number depends on how wide and long you want your farmhouse table to be. For a standard 6-foot table, plan for about 6-8 boards.
- 4×4 posts for the legs: These give the table that sturdy, chunky look if you want four legs. Mine has only two legs but I’ll get to that later.
- 2x4s for the apron and support: This will frame the table and hold everything together. Again, this is if you want a four-leg table. For a two-leg version, I used 4 pieces of 6 inch wide timber with two glued together to make a 12 inch board (x 2)
- A normal table height: You’ll need 30 to 32 inches so that’s the length of the legs, whether 4 or 2 legs
- Wood screws: 2.5″ to 3″ screws will do the trick.
- Wood glue: Essential for extra stability.
- Wood stain and sealer: Pick a stain colour that fits your vibe. Dark, light, natural—whatever you like.
- Sandpaper: You’ll need a few different grits to smooth things out.
- Finishing nails or a nail gun: Optional, but handy for attaching the tabletop boards. I didn’t go this way so I used 2.5″ screws which go in from underneath. Nothing to spoil the top.
Tools:
- Saw: A circular saw or mitre saw(I have this one) is the most convenient for cutting your wood to size.
- Drill: For securing everything together (I’m recommending the same as mine as it’s excellent). (please don’t use cross-head screws)
- Measuring tape: To make sure your cuts are right.
- Clamps: Helps keep boards in place while you screw them together, but I also have another method.
- Level: Ensures your table doesn’t wobble!
- Sander: You can sand by hand, but a power sander will save you a lot of time.
- Wood glue: I recommend white PVA glue for this job.
- Clamps: For holding things together while the glue dries. I “wood”nt be without mine !!
Step 1: Cut Your Wood to Size
I will give you the info for a 4 leg table separately from the two-leg jobby.
First things first – you’ll want to measure and cut your wood to size. The standard height for a dining table is around 30 inches as I said, but if you want to adjust it based on your chairs, get someone to sit on one at a table and then check the height of that table and decide from there whether you need it higher or the standard 30 inches and adjust your leg material as you calculate. It’s very easy to over-estimate and make the table too high. My advice would be to stick to 30 inches as it’s the most common worldwide.
For a 6-foot table:
- Tabletop: Cut your 2×6 boards to 72 inches (6 feet). You’ll need enough boards to get the width you want, typically around 36-40 inches.
- Legs: Cut your 4×4 posts to 29 inches long (leaving room for the tabletop thickness to reach 30 inches total).
- Apron: Cut 2x4s for the length and width. Two pieces at 62 inches for the long sides, and two at 30 inches for the short ends.
If you’re going for a different size table, just adjust these measurements accordingly.

Step 2: Build the Table Frame
Next, we’re going to assemble the frame, which is the skeleton that holds everything together.
- Lay out your 2x4s for the apron in a rectangle (two long sides and two short ends). This will sit underneath the tabletop and connect to the legs.
- Attach the legs: Stand your 4×4 posts upright at each corner of the apron. Use wood screws to secure the legs to the inside corners of the 2x4s and don’t forget the PVA glue. Make sure everything is flush and square—this is where a level comes in handy!
- Add support beams: To prevent sagging, especially with longer tables, you could run another 2×4 down the middle of the frame. This will support the weight of the tabletop but in fact, I’ve never found this necessary as the apron is strong enough unless you want to repair your motorbike on it.
- Glue: Make sure you glued all your joints. This is essential for a sturdy job. You don’t want to sit with your dinner at a wobbly table.
Once your frame is solid, it’s time to move on to the fun part—building the tabletop.
Step 3: Assemble the Tabletop
Now for the star of the show—the tabletop itself.
- Lay out your boards: Lay your 2×6 (or 2×4) boards on a flat surface, side by side. These will form the top of your table. Arrange them until you like the look of the wood grain. This is important as there’s nothing worse than looking at the finished job and thinking “If I had …..”
- Glue and clamp: Apply wood glue to the edges of the boards and clamp them together tightly. Let the glue dry for about an hour. This step is important—it helps prevent gaps in the tabletop. Now if you don’t have clamps for this part of the job you can always improvise. I don’t have sash cramps for this so I wrap a length of rope – in fact, 3 lengths of rope – around the tabletop very loosely and tie each piece in a reef knot. I take a piece of wood (any scrap will do, say 1″ by 1″ and a foot long and insert it under the rope and twist. As you twist the stick, the rope will tighten. Keep going, twisting until the rope is nice and tight and lock it in this position. It’s known as a “Spanish Windlass” or “Spanish Tourniquet”. Now just leave it for the wood to dry.
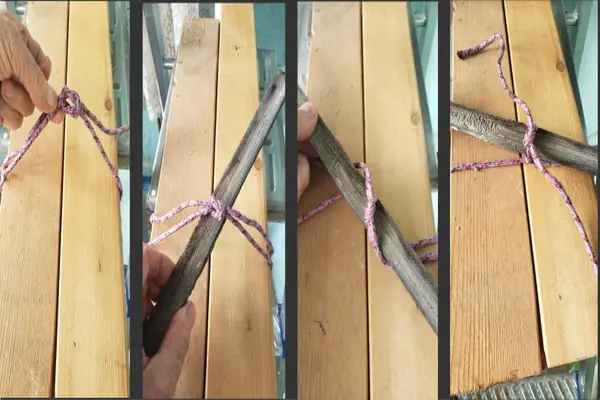
This is the “Spanish Windlass” method referred to in the text.
Sand the apron and legs: It’s far easier to sand the apron and legs at this stage before the table top is fitted. The glue should be dry on the base by now and it isn’t easy to get the sandpaper into the corners between the frame and the tabletop even with the table upside down.
I have another recommendation here. Take most of the effort out of the job and sand everything before you even think of screwing glueing and cramping anything together.
- Secure the boards: After the glue has dried, turn the tabletop over and screw the apron to the tabletop (the 2×4 frame you built earlier). Use screws from underneath so they’re hidden from view. If you’re feeling fancy, you can also use pocket holes for an even cleaner look. PLEASE make sure your screws aren’t too long. You don’t want them poking through the top!
- Sand the tabletop: Once everything is screwed together, it’s time to sand to tabletop. This is also much easier at this stage of the game as the tabletop is now at a nice working height. If needed, start with a coarse grit to even out any unevenness, then move to a finer grit to smooth it out. Take your time here—it’ll make a big difference in the final look.
I don’t have photos of one of these but it’s a standard common or garden 4 leg table. I have photos of the one I built which is a little more complicated (but not much).
Step 4: Stain Or Varnish Your Table
Now that your table is fully assembled, the final step is to seal and then stain it. This is where your farmhouse table really comes to life!
- Choose your stain: Whether you’re going for a dark, rustic look or a light, natural finish, pick a stain that matches your style. Apply it evenly with a brush or rag, following the grain of the wood. Personally, I like a light colour for my finish and for this reason, I use a good quality matt varnish. I’m not a fan of shiny furniture unless the shine has come from years of handling which gives a more genuine period look.
- Let it dry: Give the stain plenty of time to dry—usually around 24 hours.
- Sand the table again: It’s called “de-nibbing” it is to get rid of any little flecks of hair or anything which may have adhered to the top of the table in particular. Don’t go mad with the sanding at this stage. A light sanding is all that is needed.
- Finishing the new tabletop: After the light sanding, I give my table tops a second coat of that matt varnish. Let it dry again. There’s no hurry is there? Once again a light sanding after that coat has thoroughly dried. Now I give it a good wax polishing with beeswax well rubbed in. This step is important, especially if you’re using the table outdoors or in a kitchen.
Step 5: Enjoy Your New Farmhouse Table!
My version of a small Farmhouse Table made from reclaimed wood.
And there you have it—your very own four-leg farmhouse table! Take a step back and admire your work. You’ve built a functional, beautiful piece of furniture from scratch, and it’ll be a centrepiece for years to come.
Now I will get into the differences for the two-leg masterpiece, so back to Step 1at the beginning of this post.
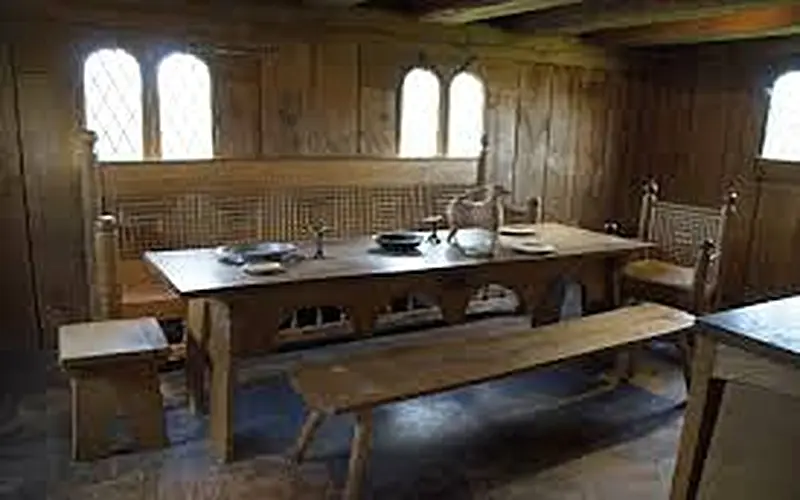
The two-leg version which is the last one I built, was made based on a design I saw which was a Tudor table, about 500 years old. This comprised two ogee-shaped legs with wide bases and wide tops to fix to the tabletop.
It also featured a “spreader” secured to the legs by mortise and tenon joints locked by wedges. Which really gives that antique look which I love.
A 1500s Style Farmhouse Table
- The Legs: The legs comprise 4 parts each. The leg proper, a wide piece almost the width of the tabletop, a leg base and a single foot.
- The Leg Shpe: There is no necessity to shape the legs in the ogee style and they can equally be plain lengths of wood, but I prefer that little je ne sais quoi. Cut two legs 27 inches long x 12 inches wide from 1.5 inch thick wood. Now either leave it like this or treat it to the curves of the ogee. Cut a mortise in the leg centrally and 6 inches from the bottom. The mortise is 2.5 inches wide across the width of the leg, and 1.5 inches from top to bottom.
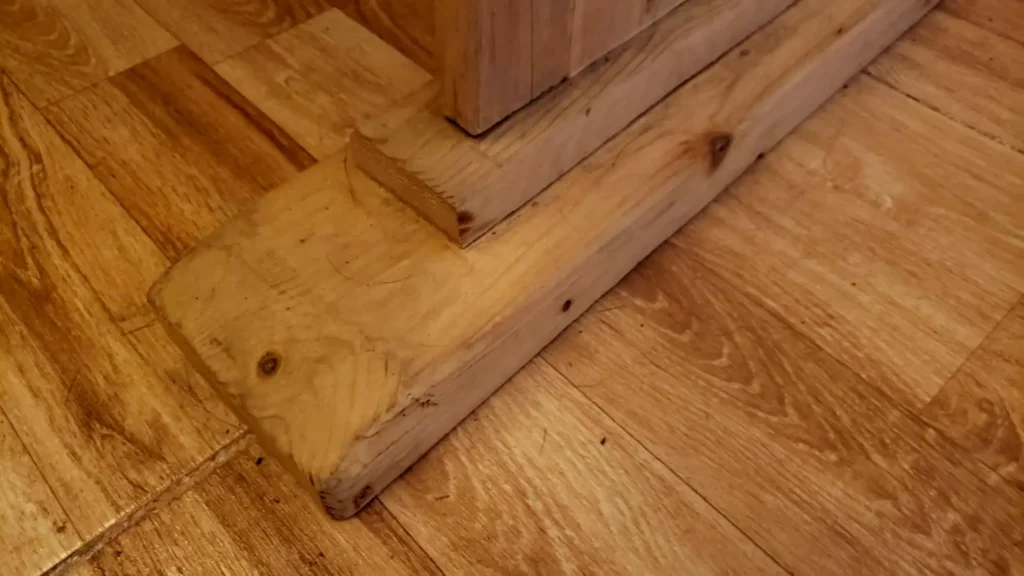
- Fixing Method: at each end of the leg, I cut two tenons an inch long. Next, I took the piece which is almost the width of the tabletop and cut two matching mortises in the centre and glued and cramped it to one end of the foot. For the bottom end, I cut two mortises in a piece of wood (the foot spreader) which is 6 inches longer than the width of the leg ( leg = 12 inches wide so this piece was 18 inches x 3 inches wide and 1.5 inches deep). Now glue the tenons into the mortises at both ends and MAKE CERTAIN that the table spreader is absolutely parallel with the foot spreader. If it isn’t your table will wobble
- A simple way to get the table level is to check a floor for level. Stand the complete leg and foot on the floor in the upright position and then before the glue dries, check and adjust the table spreader rail which screws to the tabletop to make sure it’s level. Do that with both legs and you have a winner.
- Table Foot: I cut the foot of the leg from waste timber 24″ x 6 inches wide and 2 inches thick. I glued and screwed this to the foot spreader from underneath so that no screws show anywhere on the surfaces. I also chamfered the ends of the foot only for aesthetic reasons.
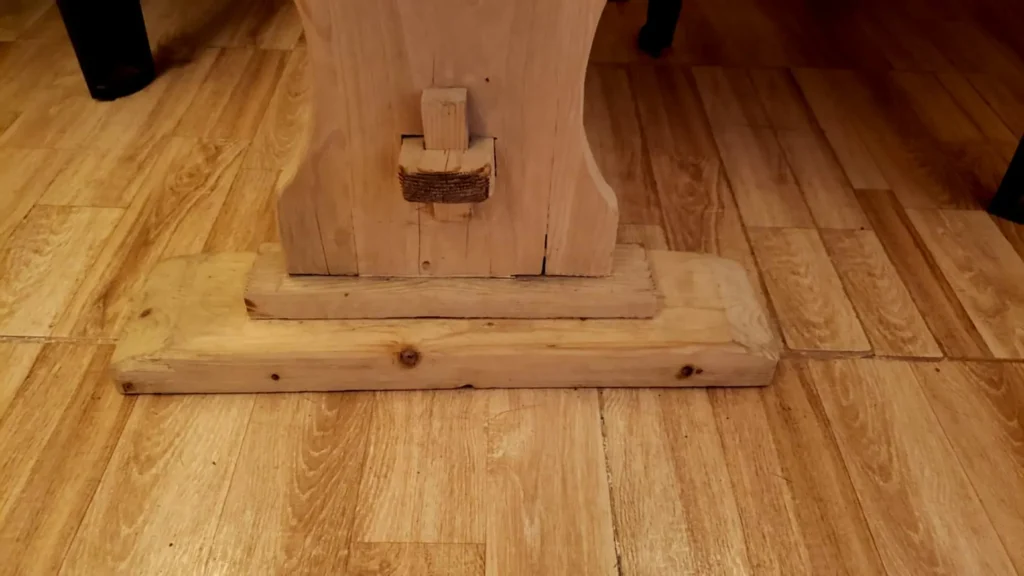
- The Leg Spreader: The length of the leg spreader will depend entirely on the length of your table. I cut a piece of wood 42 inches long and 4 inches wide x 1.5 inches. I decided on this length as detailed below. I took 24 inches from the length of my tabletop, then subtracted the thickness of the two legs (1.5 inches each, or 3 inches total). This measurement is so that the spreader fits between the legs. Now, as each leg is 1.5 inches, I added a further 2.5 inches making a total of 4 inches. I then marked this length on the spreader wood, added the distance between each leg (in my case 34 inches) and added a similar amount at the other end. So my total length for the spreader was 34 + 4 + 4 = 42 inches. I marked the spreader at 4 inches from each end and cut tenons on each end 2.5 inches wide and the full 4 inches long.

- Fixing Spreader To Legs: The tenons on the spreader fit neatly into the mortises on the legs which were cut earlier 6 inches from one end. As the tenons are 2.5 inches longer than the thickness of the legs, they will protrude by 2.5 inches. So before we go any further, a mortise is cut through these tenons at 1.25 inches from the shoulders of the tenons. Can you see that when the tenons of the spreader are inserted into the legs, part of the mortise on the spreader, will still be within the leg mortise?
- Putting The Base Together: With both legs finished, the spreader tenons are pushed into the leg mortises and protrude from the other side with part of the spreader mortise showing and about 1/4 inches of spreader mortise still within the leg mortise. Now we cut two wedges about 4 inches long and with a gentle slope (must be gentle) with a thick end wider than the spreader mortise. These are gently knocked into the exposed parts of the spreader mortises and lock the spreader in place.
Fixing a broken wedged tenon
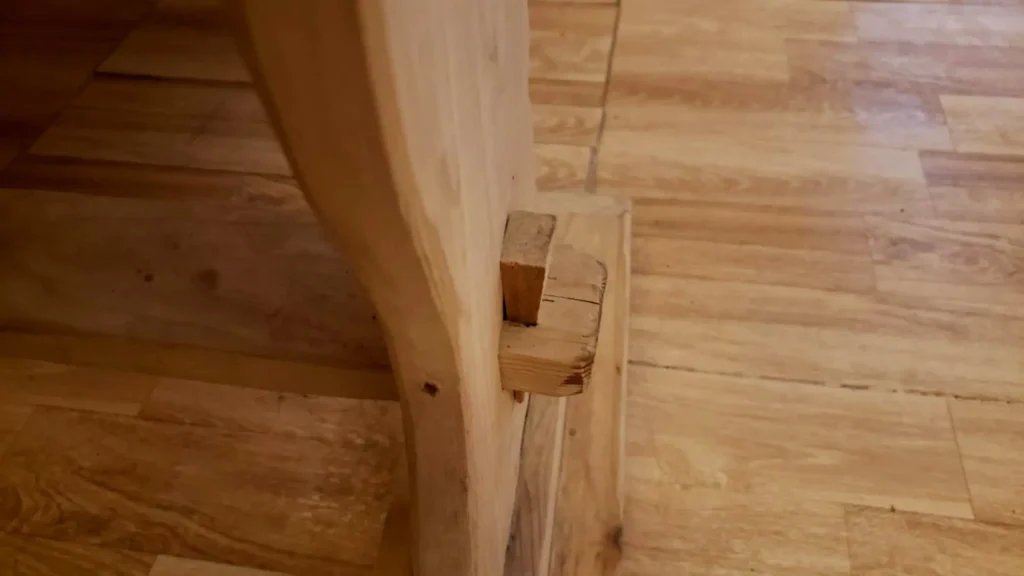
- Now if you should knock the wedges in too hard – (don’t do it) – there is a chance that the wedge will break away the piece of wood on the outside of the spreader tenon. There is a way to fix this.
- Glue the broken piece back in with PVA glue and drill a horizontal cross hole where the black mark is in the photo near the end of the tenon, but nearer to the wedge and tap a dowel right through the tenon so that the wedge pressure is taken by the dowel.
- Adding The Table Top: Now turn the table top upside down and position the base equally according to its measurements. Screw and glue the base to the tabletop and lo and behold you have a completed 1500s designed farmhouse table.
Tips for Success
Here are a few quick tips to keep in mind:
- Take your time: Building a farmhouse table is a marathon, not a sprint. Rushing through cuts or assembly can lead to mistakes.
- Measure twice, cut once: This old saying is 100% true in woodworking. Double-check your measurements before making any cuts.
- Practice makes perfect: If this is your first time building a table, don’t worry if it’s not perfect. Each project you tackle will help you improve.
Commercially available farmhouse tables are expensive. Building your own farmhouse table from scratch is more than just a DIY project—it’s an experience. You’re creating something that’s not only functional but also deeply personal. Every time you sit down to a meal or gather with friends and family around the table, you’ll have the satisfaction of knowing you built it yourself.
So, grab those tools, pick up some timber, and get to work! You’ll be surprised by how fulfilling it is to build something as meaningful and lasting as a farmhouse table.
As an Amazon associate, I earn from qualifying purchases. This does not affect your purchase price.