
Restoring old furniture isn’t just about saving money (although that’s a huge perk), it’s also about giving new life to pieces that might otherwise end up in a landfill. You’ve found yourself staring at that old, tired-looking dresser or maybe an ancient chair in the attic, wondering if it has any life left in it. The good news is that It definitely does. Plus, there’s something incredibly satisfying about turning something worn and weathered into a statement piece for your home.
Table of Contents
I’m going to introduce you to some budget-friendly hacks for restoring old furniture. No need for fancy tools or expensive materials—just a bit of creativity, elbow grease, and these tips. Let’s dive in and get that old furniture looking brand new!
Why Are We Restoring Old Furniture?
Now there are some pieces of furniture which should NEVER be restored. Antique furniture can be repaired if it has something missing or if something is damaged, but otherwise, a “restoration” will detract considerably from its value and may make a valuable item worthless.
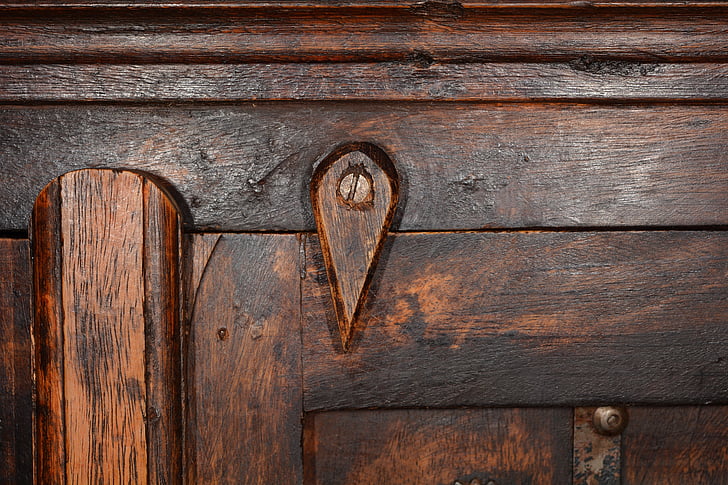
I once spent a few years in my spare time working at Nye Antique furniture business which was owned by an old friend, David White. I have worked on literally hundreds of pieces of antique furniture. The example below is a genuine antique and I would not be happy to do any repair or restoration work on such an item at all. I suspect this item is a few hundred years old. Even screws on this should not be replaced as they were often made completely by hand. DON’T even clean this apart from a rub-over with white spirit to take off a minimum of the grime. Be warned. You could ruin something valuable.
- Saving Money: Brand new furniture can be expensive, especially if you want high-quality pieces. Restoring old furniture is often way more affordable.
- Customization: When you restore furniture, you get to make it completely your own. Whether you want a bold pop of colour or a rustic finish, it’s up to you.
- Sustainability: It’s no secret that restoring furniture is eco-friendly. You’re preventing perfectly good pieces from ending up in the trash and reducing the demand for new materials.
Now, let’s get started with the practical part of restoring old furniture!
Step 1: Prep Work (Because It’s All About the Prep!)
First things first, Now these tips go for restoring old furniture of any kind but you need to prep the furniture before you can start painting or restoring. This might sound like the boring part, but trust me, it’s essential. Proper prep work can make or break the final result.
Cleaning:
Before anything else, give the piece a good clean. Old furniture often has layers of dust, grime, or old polish that you’ll want to remove. A simple mixture of warm water and mild dish soap works wonders. Just use a cloth or sponge and give it a good wipe down. For particularly stubborn stains, a bit of white vinegar can help.
When I was restoring furniture for my antique dealer friend, I used a mixture of all of the above in a plastic bottle. Before using it it should be well shaken. As white spirit does not mix with water and vinegar, it will have separated out when standing, hence the shaking up of the contents.
This can be used on virtually any furniture to remove residue from age.
Sanding:
Now so long as it’s not a genuine antique, you can continue. Once it’s clean, it’s time to sand. Sanding smooths out any rough spots removes old paint or varnish, and helps your new paint or stain adhere better.
- For a light refresh: Use fine-grit sandpaper (around 220 grit) to lightly sand the surface. I rarely used sandpaper. Wire wool was my method of attack if the item was in reasonable condition, this was great if the piece was in decent shape but just needed a new coat of paint but if sanding really was necessary, I went for my power sander.
- For a full restoration: If there’s peeling paint, deep scratches, or old varnish, you’ll need to go a bit rougher. Start with medium-grit sandpaper (around 120 grit) and work your way up to fine grit for a smooth finish.
Use a sanding block or an electric sander if you have one, but if not, good old-fashioned elbow grease will do the trick.
Step 2: Choose Your Paint or Stain
Now comes the fun part—choosing how you want your furniture to look! Whether you go with paint or stain depends on the style you’re aiming for.
Paint:
- Chalk paint is a popular choice for DIYers because it doesn’t require as much prep work. It’s great for that shabby-chic, distressed look and it dries quickly.
- Latex paint is a good all-around choice if you want a clean, smooth finish and comes in any colour you can imagine. You can even get creative with colours to make your piece really stand out.
- Spray paint is a fast and easy option for smaller pieces like chairs or side tables. It can also be a lifesaver if your piece has intricate details that would be tough to paint with a brush.
Stain:
If you want to highlight the natural beauty of the wood, staining might be the way to go. Stains come in a variety of shades, from light and natural to dark and moody. Just be sure to test the stain on a small, inconspicuous area first to see how the wood takes it.
Tip: Whether you choose to paint or stain, make sure to use a primer first, especially if you’re working with bare wood or trying to cover a dark colour.
Step 3: Apply Paint or Stain Like a Pro
Now that your furniture is prepped and you’ve chosen your finish, it’s time to get painting (or staining)!
Painting:
- Primer first: If you’re using paint, apply a coat of primer before anything else. This helps the paint stick better and gives you a smoother finish.
- Thin coats are your friend: When it comes to paint, two or three thin coats are better than one thick one. Thin coats will dry faster, and you’ll avoid drips and brush marks.
- Let it dry: Be patient and let each coat dry completely before applying the next one. If you rush, you might end up with a tacky surface that never fully hardens.
Staining:
- Wipe it on: Use a clean rag or brush to apply the stain. Wipe it on in the direction of the wood grain, and don’t worry if it looks a little uneven at first.
- Wipe it off: After letting the stain sit for a few minutes, wipe off any excess with a clean rag. The longer you let it sit, the darker the stain will be.
- Seal it up: Once the stain is dry (typically 24 hours), apply a sealant like polyurethane to protect the wood and give it a smooth, durable finish.
Tip: For a more modern look, consider a two-tone approach where you paint the legs of a table and stain the top!
Step 4: Get Creative with Details
Once you’ve got the basic paint or stain down, why not add some creative touches to really make your piece unique?
- Distressing: For that vintage, farmhouse feel, distress the furniture by lightly sanding edges and corners after the paint has dried. Focus on areas that would naturally wear over time, like drawer edges and handles.
- Hardware Upgrade: Replacing old knobs, pulls, or handles can give furniture an instant face-lift, but be careful. That face-lift can make some furniture look odd and even reduce the value. The style of furniture often demands a particular style of furniture ( the hardware on furniture is also called furniture so it’s furniture furniture ). You can find affordable hardware at thrift stores, flea markets, or even online.
- Stencilling: If you want to add a pattern or design, stencilling is a fun option. You can buy pre-made stencils or even make your own with cardboard. Just make sure the paint underneath is fully dry before you start stencilling!
Tip: If you’re going for a distressed look, consider using a wax finish instead of polyurethane. It gives a softer, vintage finish that pairs beautifully with chalk paint.
Step 5: Seal and Protect Your Work
After all that hard work, you want to make sure your piece lasts, right? When restoring old furniture, sealing is a crucial step to protect your newly painted or stained furniture from scratches, spills, and everyday wear and tear.
For painted furniture:
- A clear polyurethane finish works well for high-traffic pieces like tables or dressers. For a more matte finish, opt for a wax sealer, which gives a soft, velvety feel.
For stained furniture:
- Use a clear coat to protect the wood. Polyurethane is the most durable, but you could also go with a wipe-on poly for a more natural, less shiny look.
Tip: When sealing, make sure to apply it in thin, even coats and let each layer dry thoroughly before applying the next one. Patience pays off!
Step 6: Step Back and Admire Your Work
After everything has dried and set, take a step back and admire what you’ve done. You’ve turned a forgotten, old piece of furniture into something beautiful and functional. Plus, you did it without breaking the bank. Restoring old furniture is an extremely satisfying pastime and can be profitable into the bargain.
Restoring old furniture isn’t just a fun, creative project—it’s a way to save money, live more sustainably, and create pieces that reflect your personal style. The best part is, that you don’t need to be a professional woodworker or have a huge budget to get amazing results.
By following these budget-friendly hacks, you’ll be able to transform old furniture into statement pieces that you’ll be proud to show off. So next time you’re tempted to toss that old chair or dresser, think twice—you might just have your next DIY masterpiece waiting for you.