
Have you ever found yourself wondering, “What if?” while staring at an old dresser tucked away in a corner, its paint peeling and drawers reluctant to open? What if you could breathe new life into that forgotten piece of furniture and transform it into a stunning relic of the past? The good news is that you absolutely can, and the process is both enjoyable and budget-friendly. Repurposing an old dresser not only saves it from the landfill or the bonfire but also allows you to create a one-of-a-kind piece that adds character and charm to your home.
Table of Contents
Why Refinish An Old Dresser?
Before we dive into the hands-on work, let’s explore why recycling is such a great choice:
Environmentally Friendly:Rather than discarding furniture and adding to waste, recycling enables you to reuse materials and lessen your environmental footprint.
Customization:You have the freedom to design the piece to reflect your personal style, whether it leans towards rustic, modern, or vintage aesthetics.
Cost-Effective: Purchasing new furniture can be pricey. Upcycling offers a way to achieve a high-end look without breaking the bank.
Now that we understand the advantages, let’s get started on the step-by-step journey of turning your old dresser into a vintage treasure.
Step 1: What Is The Condition of the Dresser
Before you begin, take a close look at the dresser you’re going to be working on. Is it made of solid wood, or is it constructed from particleboard? Are the drawers functioning well, or do they require some repairs? It’s far easier and more satisfying to work on a dresser or indeed any furniture, which is made from solid wood.
Things to Consider:
Structure:Ensure the dresser is sturdy enough for your project. If the joints are loose, use wood glue and clamps to reinforce them.
Damage:If there are significant issues like deep scratches or water stains, you’ll need to tackle those before moving forward. Don’t worry about them—most issues can be resolved with some sanding and filler!
Tip:If your dresser is missing hardware (like drawer handles), replacing them is easy. It’s not a matter for now. We’ll come to that in Step 5 but read on as there are do’s and don’ts in this too.
Step 2: Preparing The Dresser
With any piece of furniture, you need to clean it up before you strip it down
Cleaning:
Start by giving the dresser a thorough cleaning to get rid of any dust, grime, or old wax. A simple mixture of warm water and mild soap works well with a little vinegar and white spirit added. Mix this in a bottle and close the cap. You will find that if you shake this mixture it will go white. This is because the vinegar and water do not mix with the white spirit. Let it stand for a little while and it will separate out again. Only use it immediately you have shaken it.
Sanding:
Depending on the finish that’s on the dresser, you may need to remove it using paint stripperor simply sanding. Sanding will in any case be necessary at some point. Now for sanding, if you aren’t into hard elbow grease, you may want to use a power sander. It’s much faster and easier. If elbow grease doesn’t bother you, begin with a medium-grit (around 120 grit) and then change to a finer grit (220 grit) for a smoother finish. For intricate areas like mouldings or carvings, consider using a sanding sponge or even steel wool to reach those tight spots. Steel woolwill cause less damage to mouldings. I use wire wool with beeswax which gives a nice smooth and deep finish.
Tip: If your dresser is in relatively good shape and you plan to use chalk paint (which adheres well to most surfaces), you can skip some of the heavy sanding. However, a light sanding will still enhance paint adhesion.
Step 3: Choose Your Finish (Paint or Stain?)
Now it’s time to decide on the look of your dresser. Do you prefer a clean, painted finish or a more natural wood appearance? Both options can create a vintage masterpiece, but they offer different aesthetics. Distressed furniture is very popular and easy to achieve.
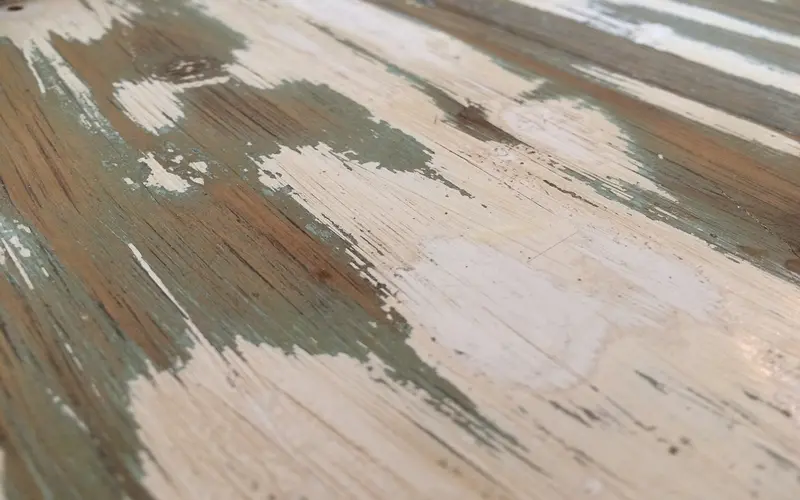
Painting:
• Chalk paint is a favoured choice because it’s user-friendly and provides a lovely matt, vintage finish. Plus, it doesn’t require a primer.
• Milk paint is another excellent option for an old-world look. It chips naturally over time, creating that aged, weathered effect.
• Latex paint is a good alternative if you’re looking for a smoother finish and a wider range of colours.
Tip:For a distressed appearance, apply a base coat of one colour, then paint over it with a different colour. Let the first coat dry properly then when you apply the second colour, wipe over it with a rag to remove some of this second colour. This gives a very interesting and vintage look to the piece. Once dry, lightly sand the edges with sandpaper to reveal the base coat underneath.
Staining:
If you appreciate the look of natural wood, staining could be the perfect option for you. Stains are available in a variety of shades, ranging from light and natural to deep and bold. Be sure to test the stain on a small section before applying it to the entire piece.
• Use a rag or brush to apply the stain, following the direction of the wood grain.
• After a few minutes, wipe away any excess to prevent uneven colouring.
Once the stain has dried (typically after 24 hours), finish with a clear coat to safeguard the wood.
Step 4: Paint or Stain Your Dresser
With your finish selected, it’s time to dive in.
For Painting:
1. Apply Primer (optional but recommended for latex paint): If you’re opting for regular paint instead of chalk paint, begin with a coat of primer. This step enhances paint adhesion and results in a smoother finish. The reason for a primer is that it locks subsequent coats of paint to the wood whereas some paints neither adhere well of simply soak into the wood making several coats necessary
2. First Coat: Use a brush or roller to apply the initial coat of paint. Start with thin layers to prevent drips, allowing each coat to dry completely before adding the next.
3. Second Coat:Once the first coat is dry, apply a second coat for a more opaque finish. Depending on your desired look, a third coat may be beneficial.
4. Distressed Finish:For a vintage, shabby-chic appearance, take some fine-grit sandpaper and gently sand the edges and corners of the dresser to expose the base colouror wood beneath. Don’t do this if your dresser is made from particle board.
If your dresser is not made from real wood, it’s not advisable to do any of this step. Particle board is made from sawdust mixed with glue and pressed to make a board. If you go through the covering of the board with your sandpaper, the finish looks awful laying bare nothing but glued sawdust.
For Staining:
1. Apply the Stain:Use a clean rag to apply the stain to the wood, following the grain.
2. Wipe Off Excess: After allowing the stain to sit for a few minutes, remove any excess with a clean cloth. The longer the stain sits, the darker the result will be.
3. Seal the Finish:Once the stain is dry, apply a clear polyurethane or wax to protect the wood.
Tip: If you plan to stain and paint different sections of the dresser (like painting the body and staining the top), make sure to tape off the areas you want to keep free from paint or stain.
Step 5: Replace or Refresh Hardware
The hardware—knobs, pulls, and handles—can significantly impact the overall appearance of your finished piece. If the original hardware is still in good shape, consider cleaning it up and reusing it. DON’T fit modern handles to a vintage piece of furniture. It just looks wrong. However, if it’s damaged, there are lots of reproduction replacements available which give the right “feel” to the furniture.
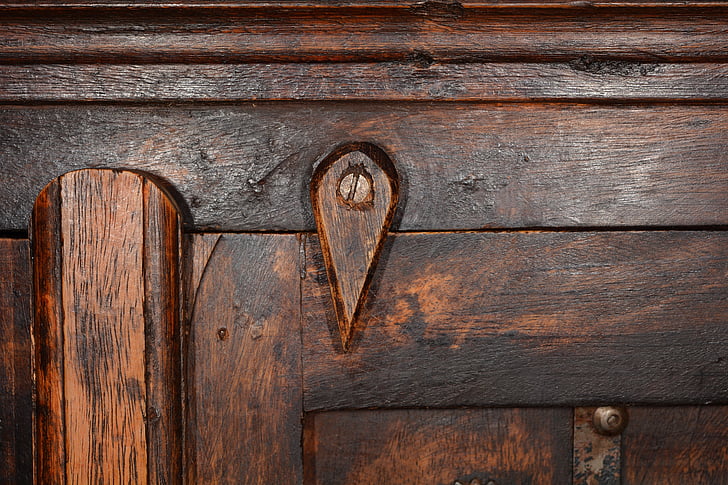
NEVER paint, stain, varnish or sand this kind of furniture or you will lose an awful lot of value
Cleaning Old Hardware:
• Use warm water mixed with a bit of dish soap to remove the grime.
• For tougher dirt or tarnish, soak the hardware in vinegar or a metal cleaner.
A word of warning. If the dresser is a genuine antique, DO NOT polish the handles etc. Simply clean them in soapy water. A lot of value can be taken off antiques by good intentions. Antiques should be cleaned, but NEVER stained, varnished or painted and never polish the metal components.
Replacing Hardware:
• Vintage-style hardware can be found at hardware stores, flea markets, or online. Select pieces that align with the aesthetic you’re aiming for, whether it’s rustic, antique, or modern.
• If you’re replacing drawer pulls and the new ones don’t fit the existing holes, fill the old holes with wood filler, sand them smooth, and then drill new holes for the new hardware.
Step 6:Seal and Protect Your Masterpiece
After painting or staining your dresser and installing the hardware, the final step is to safeguard your hard work. This will help ensure your piece endures for years to come.
For Painted Furniture:
• Apply a clear wax or polyurethane to seal the paint and protect it from everyday wear and tear. Wax provides a soft, matte finish, while polyurethane offers greater durability.
For Stained Furniture:
• Use a clear coat of polyurethane for a glossy or satin finish. Alternatively, you can choose a wax finish for a softer, more vintage appearance.
Step 7: Style Your New Vintage Masterpiece
Now that your dresser has been beautifully transformed into a vintage piece, it’s time to showcase it! Position it in your bedroom, living room, or hallway, and accessorise with a vintage mirror, fresh flowers, or framed photos.
Restoring an old dresser into a vintage masterpiece is not only a fun and creative endeavour, but it’s also a fantastic way to save money, minimize waste, and personalise your home. Whether you opt for a distressed, shabby-chic look or a sleek, modern vibe, the process is all about creativity.
My friend was born upside down. His nose runs and his feet smell.