
How to Build Your Own DIY Air Compressor Using an Old Engine
Introduction
Build a Powerful Workshop Air Compressor from an Old Engine
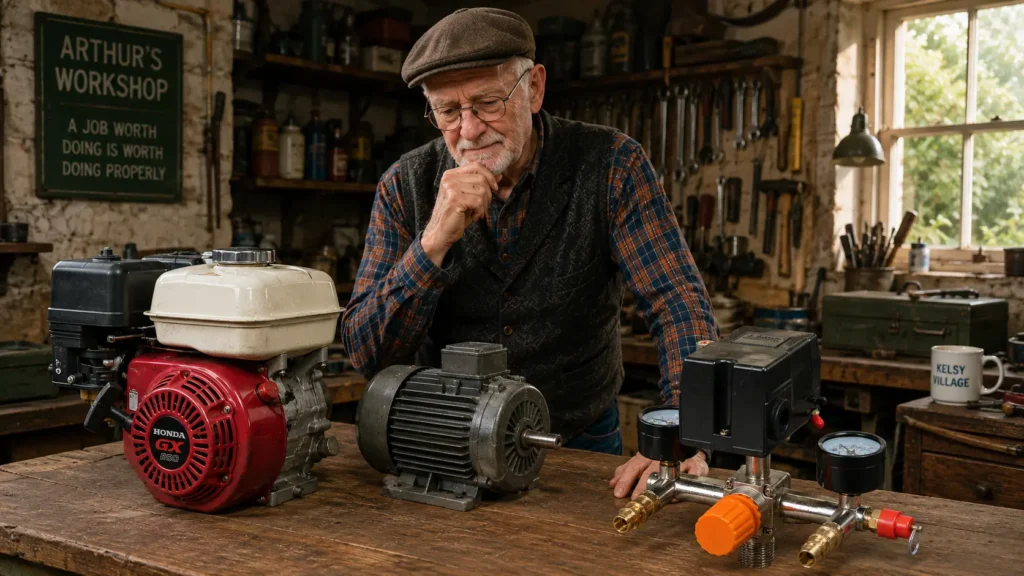
Arthur’s Workshop
Every workshop eventually reaches the same point.
You’ve repaired the mower, restored the bicycle, sharpened the tools and built a few shelves. Then one day you wish you had compressed air.
Perhaps you want to spray paint a gate.
Inflate tyres.
Blow sawdust out of awkward corners.
Table of Contents
Operate a small air tool.
A decent compressor is one of the most useful machines you can own—but it can also be one of the most expensive.
The good news is that much of a compressor is surprisingly simple.
Today we’re going to build one.
The Secret Isn’t the Compressor
Many people imagine a compressor to be a mysterious machine.
It isn’t.
A workshop compressor is simply four things working together.
- A compressor pump
- An electric motor
- A receiver tank
- An automatic control system
Once you understand those four parts, the whole machine suddenly makes sense.
The Compressor Pump
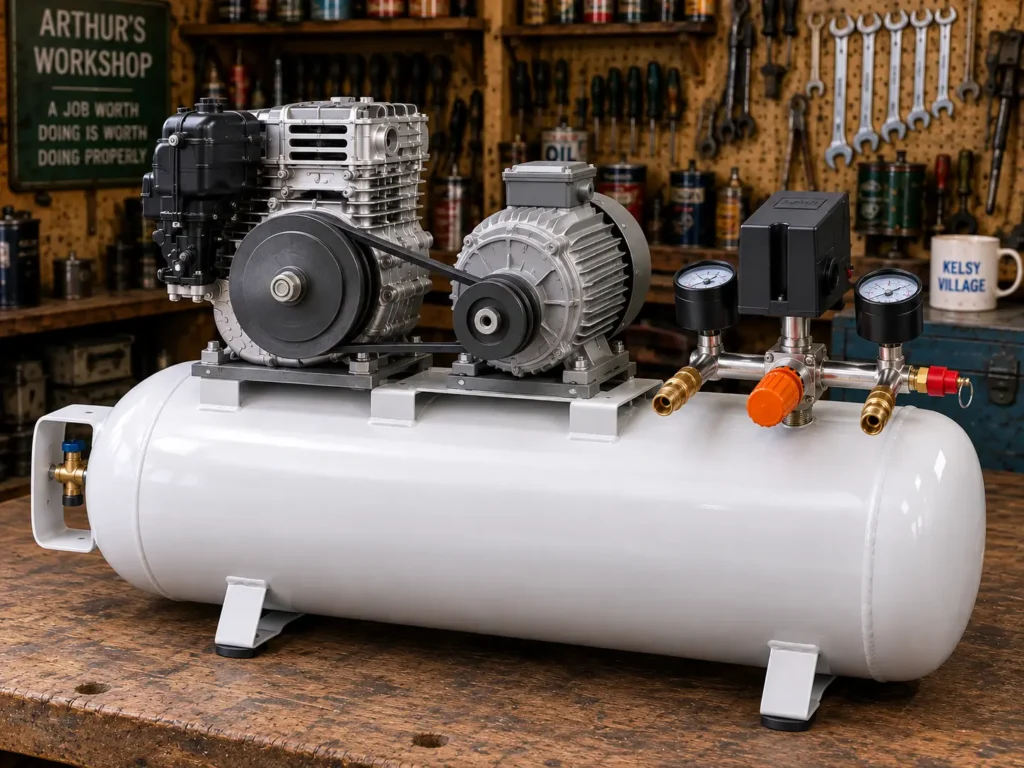
The heart of our compressor is an old petrol engine.
This may sound strange until you realise what an engine actually does.
A four-stroke engine already pumps air.
Normally it draws air into the cylinder, compresses it, burns fuel and then expels the exhaust gases.
Remove the fuel and ignition, then drive the crankshaft with an electric motor instead.
The engine continues drawing air through its original air filter.
The exhaust port now delivers compressed air.
Instead of producing power, the engine is now consuming power—and pumping air while it does so.
Choosing a Donor Engine
Many small utility engines are suitable.
Examples include:
- Honda GX160
- Honda GX200
- Briggs & Stratton lawnmower engines
- Tecumseh engines
- Similar stationary engines
- Old cement mixer engines
- Generator engines that are beyond economical repair
The engine doesn’t need to run.
It simply needs to turn freely and have reasonable compression.
If it still has good piston rings and valves, it can make an excellent compressor pump.
Preparing the Engine
The conversion is remarkably simple.
The original air filter remains exactly where it is.
It continues filtering the incoming air just as the manufacturer intended.
The exhaust becomes the compressed-air outlet.
Fit a suitable adaptor to the exhaust port and connect it to the receiver tank through a non-return valve.
The carburettor, fuel tank, ignition components and exhaust silencer are no longer required.
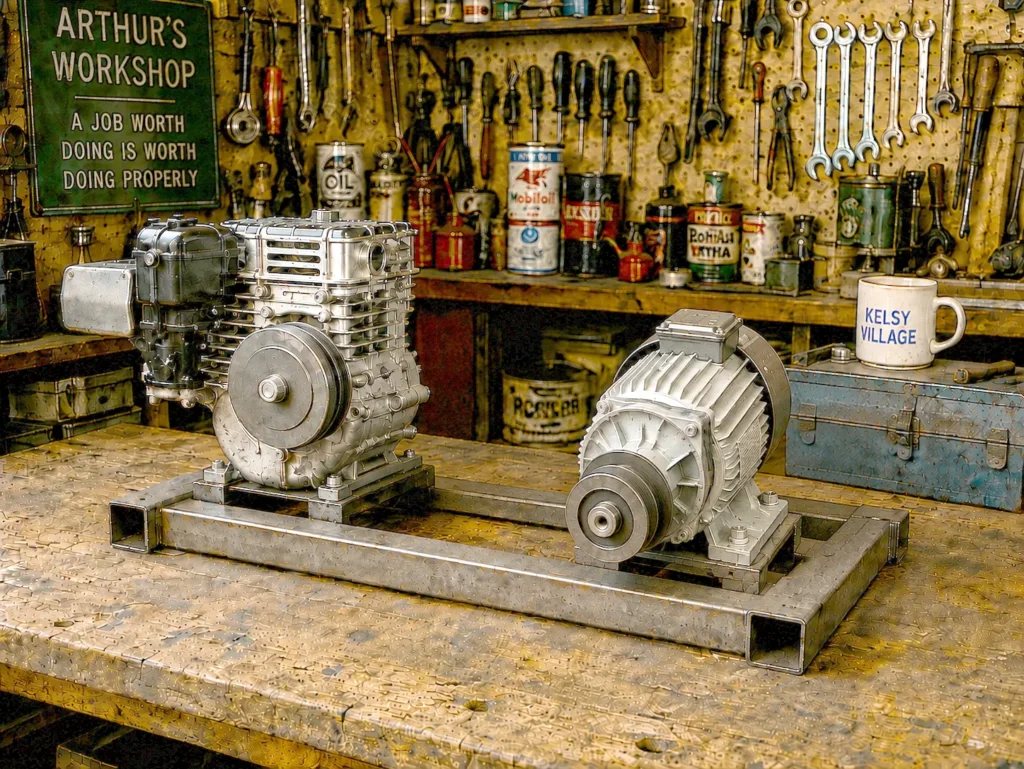
Choosing an Electric Motor
The electric motor simply replaces the petrol.
It drives the crankshaft using pulleys and a V-belt.
For most home workshops, motors between 1½ and 3 horsepower are ideal.
Suitable donor motors include:
- Old table saw motors
- Bench saw motors
- Woodworking machinery
- Industrial washing machines
- Large workshop fans
- Small industrial machinery
- Surplus farm equipment
A 1½ HP motor is suitable for lighter workshop use.
A 2–3 HP motor provides considerably more air for spray painting and pneumatic tools.
Mount both the motor and compressor pump on one substantial steel baseplate so the pulleys remain aligned.
The Receiver Tank
Every compressor needs somewhere to store compressed air.
This is called the receiver.
A receiver smooths the airflow, reduces motor cycling and provides a reserve of compressed air when required.
For this project we’re using a redundant propane cylinder as the receiver.
One advantage of these cylinders is that the original threaded valve opening provides a convenient connection point for the complete control assembly.
There is no need to drill additional holes in the pressure vessel.
The Modern Shortcut
Years ago, building a compressor meant collecting dozens of individual fittings.
Pressure switches.
Pressure gauges.
Safety valves.
Regulators.
Air outlets.
Tees.
Elbows.
Adaptors.
Today there’s a much easier solution.
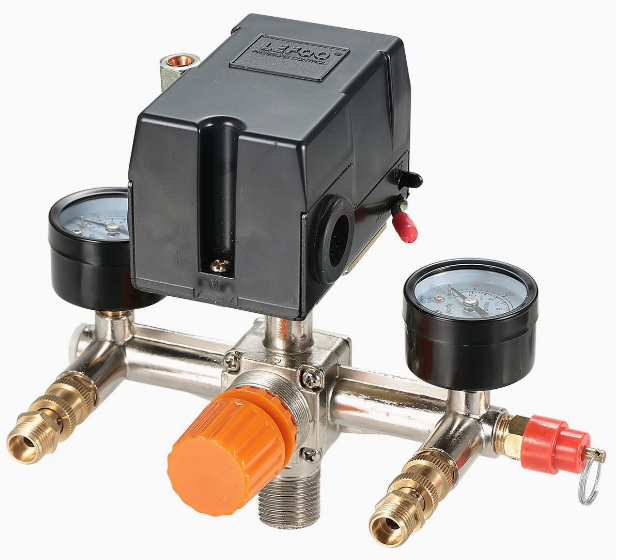
Complete compressor control manifolds are inexpensive and contain almost everything already assembled.
The example used in this workshop includes:
- Pressure switch
- Pressure regulator
- Two pressure gauges
- Two air outlets
- Safety relief valve
- Non-return valve
- Mounting connection
In other words, most of the complicated plumbing has already been done for you.
For the home builder, this makes the project considerably simpler and more reliable.
Automatic Pressure Control
Nobody wants to stand beside the compressor switching it on and off.
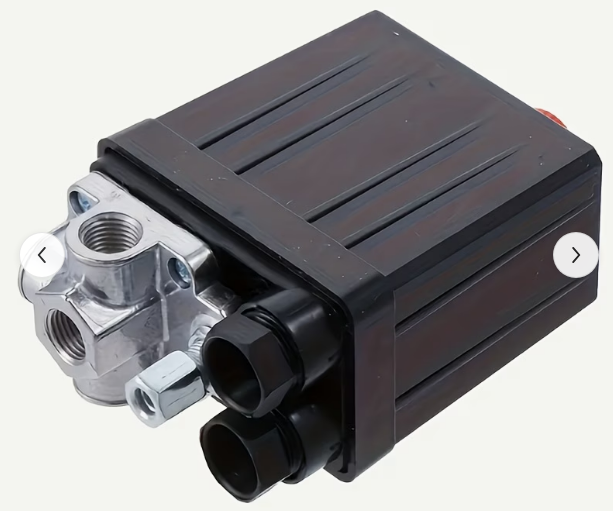
The pressure switch does that automatically.
As the receiver fills, the pressure rises.
When the preset pressure is reached, the switch disconnects the motor.
As compressed air is used, the pressure gradually falls.
When it reaches the lower setting, the switch starts the motor again.
The compressor looks after itself.
Why the Safety Valve Matters
Although the pressure switch controls normal operation, every receiver should also have a safety relief valve.
Think of it as the last line of defence.
If, for any reason, the pressure switch failed to stop the motor, the safety valve would release excess pressure before dangerous pressures could develop.
Fortunately, most complete compressor manifolds already include one.
Mounting Everything Together
Mount the compressor pump and electric motor securely to a heavy steel base.
Align the pulleys carefully.
Fit the V-belt with the correct tension.
Mount the receiver securely nearby.
Finally, connect the compressor outlet to the receiver through the non-return valve.
The complete manifold then screws into the receiver using the original threaded connection.
Most of the plumbing is now complete.
Arthur’s Workshop Tips
✔ Leave the original engine air filter in place.
✔ Use a good quality V-belt.
✔ Align the pulleys carefully.
✔ Fit rubber mounting feet if vibration is excessive.
✔ Drain condensation from the receiver regularly.
✔ Never operate without a safety relief valve.
✔ Paint the finished compressor—you’ll be surprised how professional it looks.
Typical Costs
One of the attractions of this project is that many of the expensive parts can often be obtained second-hand.
Typical examples might include:
| Item | Approximate Cost |
|---|---|
| Donor engine | Free–£10 |
| Electric motor | Free–£15 |
| Complete compressor manifold | Around £20 |
| V-belt and pulleys | £5–£10 |
| Pipe fittings | £10 |
| Receiver tank | Often available second-hand |
If you already have suitable donor parts in the workshop, the completed compressor can cost a fraction of a commercial machine with similar performance.
Final Thoughts
This project isn’t really about building a compressor.
It’s about understanding one.
Once you realise that a workshop compressor is simply a compressor pump driven by an electric motor, filling a receiver and controlled by a ready-made pressure manifold, the mystery disappears.
Modern compressor manifolds have made the project far easier than it was years ago, leaving the home engineer free to concentrate on building a solid, reliable machine instead of assembling dozens of individual fittings.
An old engine that seemed destined for the scrap heap can become one of the most useful tools in the workshop.
By the end of this workshop you won’t just know how to build a compressor—you’ll understand how one works. Once you understand that, the rest is simply engineering.