
Creating your own garden wall panels can be a cost-effective and rewarding DIY project. Whether you’re looking to add privacy, structure, or a decorative touch to your outdoor space, crafting these panels allows you to customize the design to suit your taste. This guide will walk you through the process, from materials to methods, while referencing a future post on making moulds for the panels—where you’ll also learn how to make the posts for holding the panels and add ornamentation.
Table of Contents
Why Choose DIY Concrete Garden Wall Panels?
DIY concrete garden wall panels are durable, customizable, and affordable compared to pre-made alternatives. By making your own, you can:
- Save on costs.
- Add decorative elements to suit your garden theme.
- Ensure your panels are built to your exact specifications.
Materials Required for Making Concrete Garden Wall Panels
Here’s a detailed list of materials you’ll need for crafting the panels:
| Material | Purpose |
|---|---|
| Concrete mix (cement, sand, gravel) | Main material for the panels. |
| Reinforcement mesh or rebar | To strengthen the panels and prevent cracking. |
| Mould release agent | For easy removal of panels from the mould. |
| Water | To mix the concrete. |
| Plastic or plywood sheets | For making the panel moulds. |
| Screws and nails | For securing the mould structure. |
| Concrete colouring pigments (optional) | To add color to your panels. |
| Trowel or screed board | To smooth the surface of the concrete. |
| Vibrator or mallet | To eliminate air bubbles in the concrete. |
Suggested Suppliers for Materials
| Material | Supplier |
| Cement, sand, gravel | Local hardware store or builder’s merchant |
| Reinforcement mesh or rebar | Construction supply stores |
| Mould release agent | Specialist concrete supply stores or online |
| Plastic sheets or plywood | DIY stores like Home Depot or B&Q |
| Concrete colouring pigments | Online platforms like Amazon or local DIY stores |
| Tools (trowels, mallets, etc.) | General hardware stores |
Step-by-Step Process for Making Concrete Garden Wall Panels
1. Plan Your Panel Design
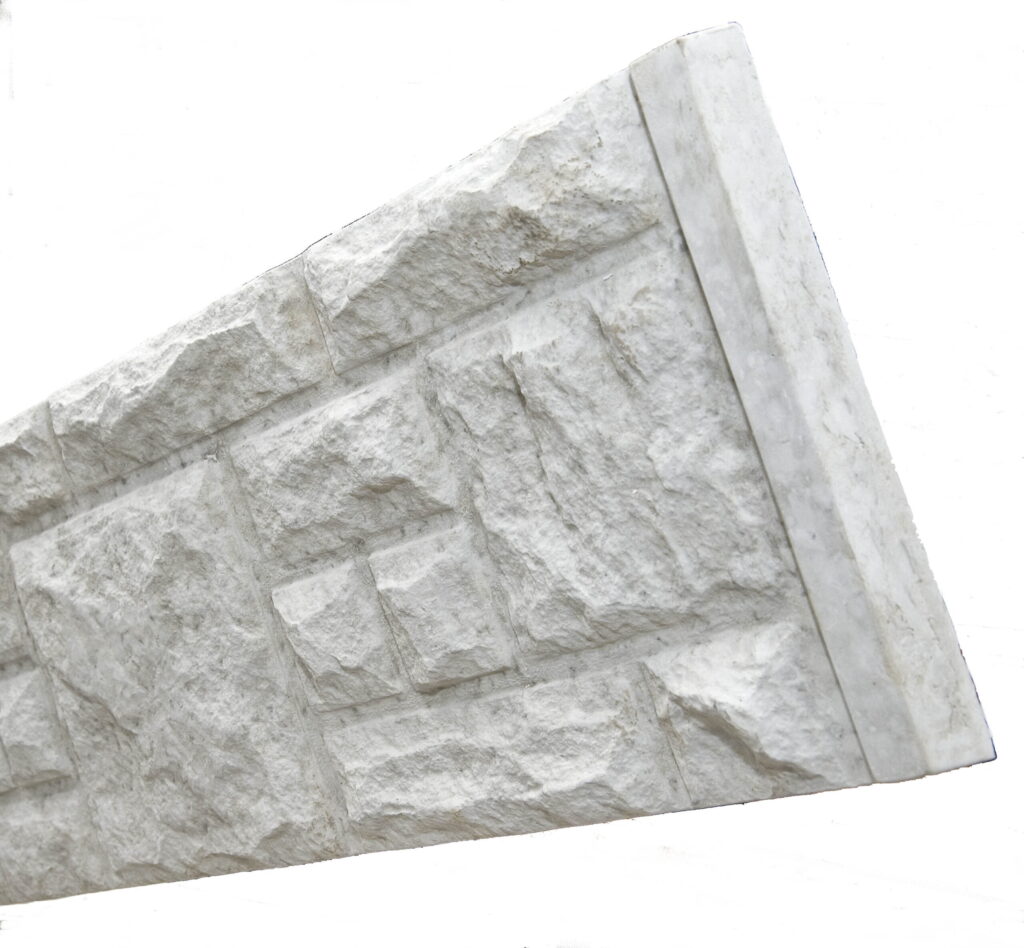
Start by deciding on the dimensions and thickness of your panels. Typical panels are 2-3 inches thick and vary in height and length depending on the wall’s purpose. Keep in mind the design elements you’d like to incorporate—ornamental patterns or textured finishes can be added using custom moulds (discussed in the upcoming post).
A “tongue” must be added to the outer edge on the vertical sides to engage with the groove in the posts for assembly purposes.
2. Prepare the Moulds
Use plastic sheets, plywood, or other sturdy materials to construct the mould. Ensure the edges are well-sealed to prevent leakage. Apply a mould release agent to the interior surface to make it easier to remove the hardened panel later.
Note: Our forthcoming post on [How to Make Moulds for Garden Wall Concrete Panels] will provide a comprehensive guide on building these moulds, including tips for adding ornamentation and instructions for crafting the posts to hold the panels.
3. Mix and Pour the Concrete
- Combine cement, sand, and gravel in a ratio of 1:2:3 (or as specified on the concrete mix instructions).
- Gradually add water until you achieve a workable consistency. Avoid making the mix too watery, as this can weaken the final product.
- Pour the mix into the prepared mould and spread it evenly using a trowel or screed board.
- Place the reinforcement mesh or rebar into the mould, ensuring it is fully embedded.
4. Eliminate Air Bubbles
To prevent voids in the concrete, use a vibrator or tap the sides of the mould with a mallet. This helps settle the mix and release trapped air.
5. Cure the Concrete
Allow the concrete to cure for at least 24-48 hours. Keep the surface damp by lightly misting it with water to ensure slow and even curing, which increases the strength of the panels.
6. Remove the Panel from the Mould
Carefully remove the mould to reveal your concrete panel. Inspect for any imperfections and smooth them out with a sanding block if necessary.
Making Posts to Hold the Panels
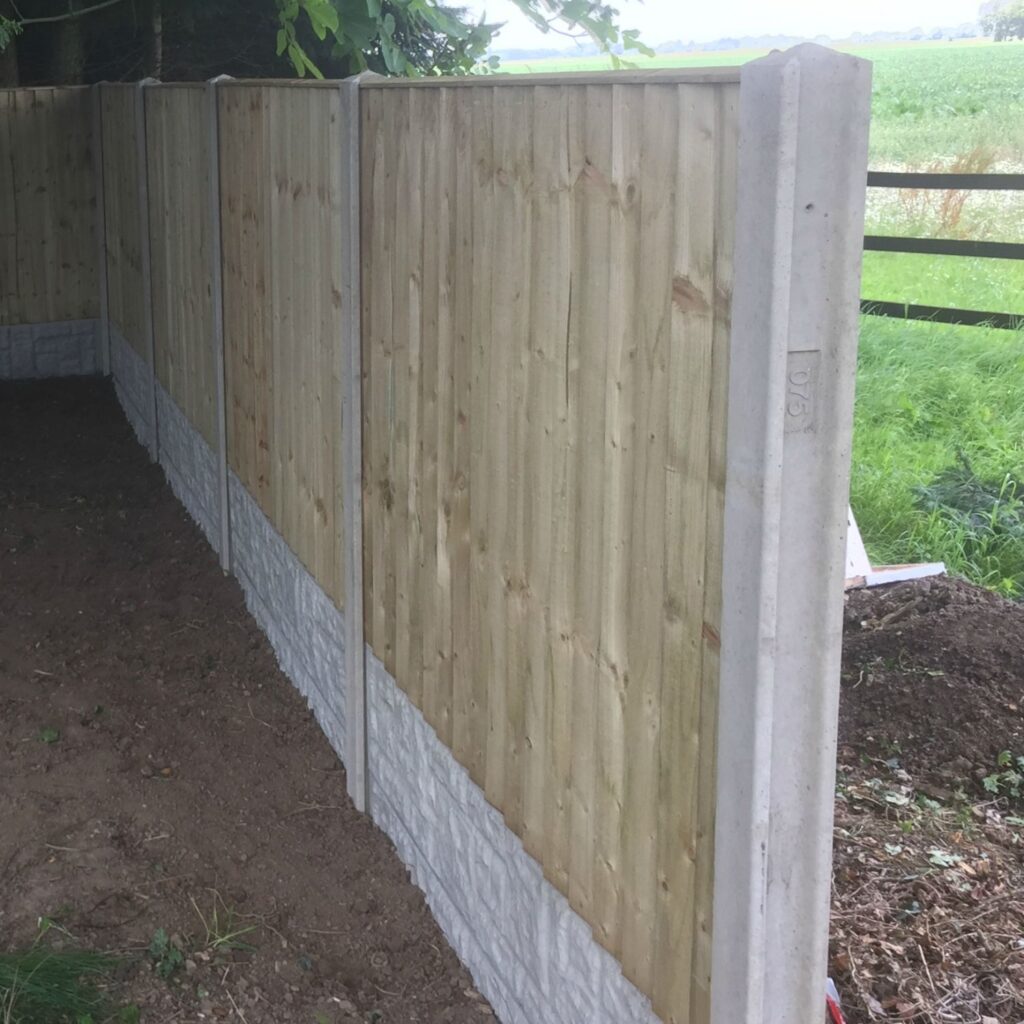
Concrete panels require sturdy posts for support. These posts can be made from concrete or metal and should have grooves or channels to secure the panels. We all know tongue and groove wooden boards. The panels should have a tongue which fits into a vertical groove on the post.
This way panels can be added to any reasonable height for which a post has been cast with the appropriate groove. Always make the grooves at least 50% wider than the tongue o the panels. !00% wider will be no problem either, but it would be disaster if the groove was too narrow to accommodate any discrepancies in the casting of the panels.
Tip: Instructions for crafting these posts are included in the upcoming post on [How to Make Moulds for Garden Wall Concrete Panels]. Be sure to check it out for detailed steps.
Customizing Your Panels
- Add decorative patterns or textured finishes using custom mould liners or stamps.
- Incorporate colouring pigments to match your garden’s aesthetic.
- Seal the panels with a concrete sealer to protect them from weathering.
Final Thoughts
Building your own garden wall concrete panels is a practical and creative way to enhance your garden. With the right materials, moulds, and techniques, you can create a durable and visually appealing wallthat’s uniquely yours. Don’t forget to stay tuned for our next post, which will delve deeper into making moulds and posts, as well as adding those all-important decorative touches.
Meta Description
Master the art of building your own garden wall concrete panels with our step-by-step guide. Learn about materials, moulds, and decorative touches to create a unique outdoor feature.